Harmony Build Guide
Updated 2025 © All Rights Reserved jvxbuilds.gg
Thank you for choosing the JVX Harmony build guide! 🎉 We’re excited to help you bring your dream gaming rig to life. Whether you're a seasoned builder or a first-timer, this guide is designed to walk you through every step of the process with clear instructions and helpful tips. We’re thrilled to be a part of your PC building journey and can't wait to see the incredible setup you’ll create. Let’s get started!
Starting with the End in Mind
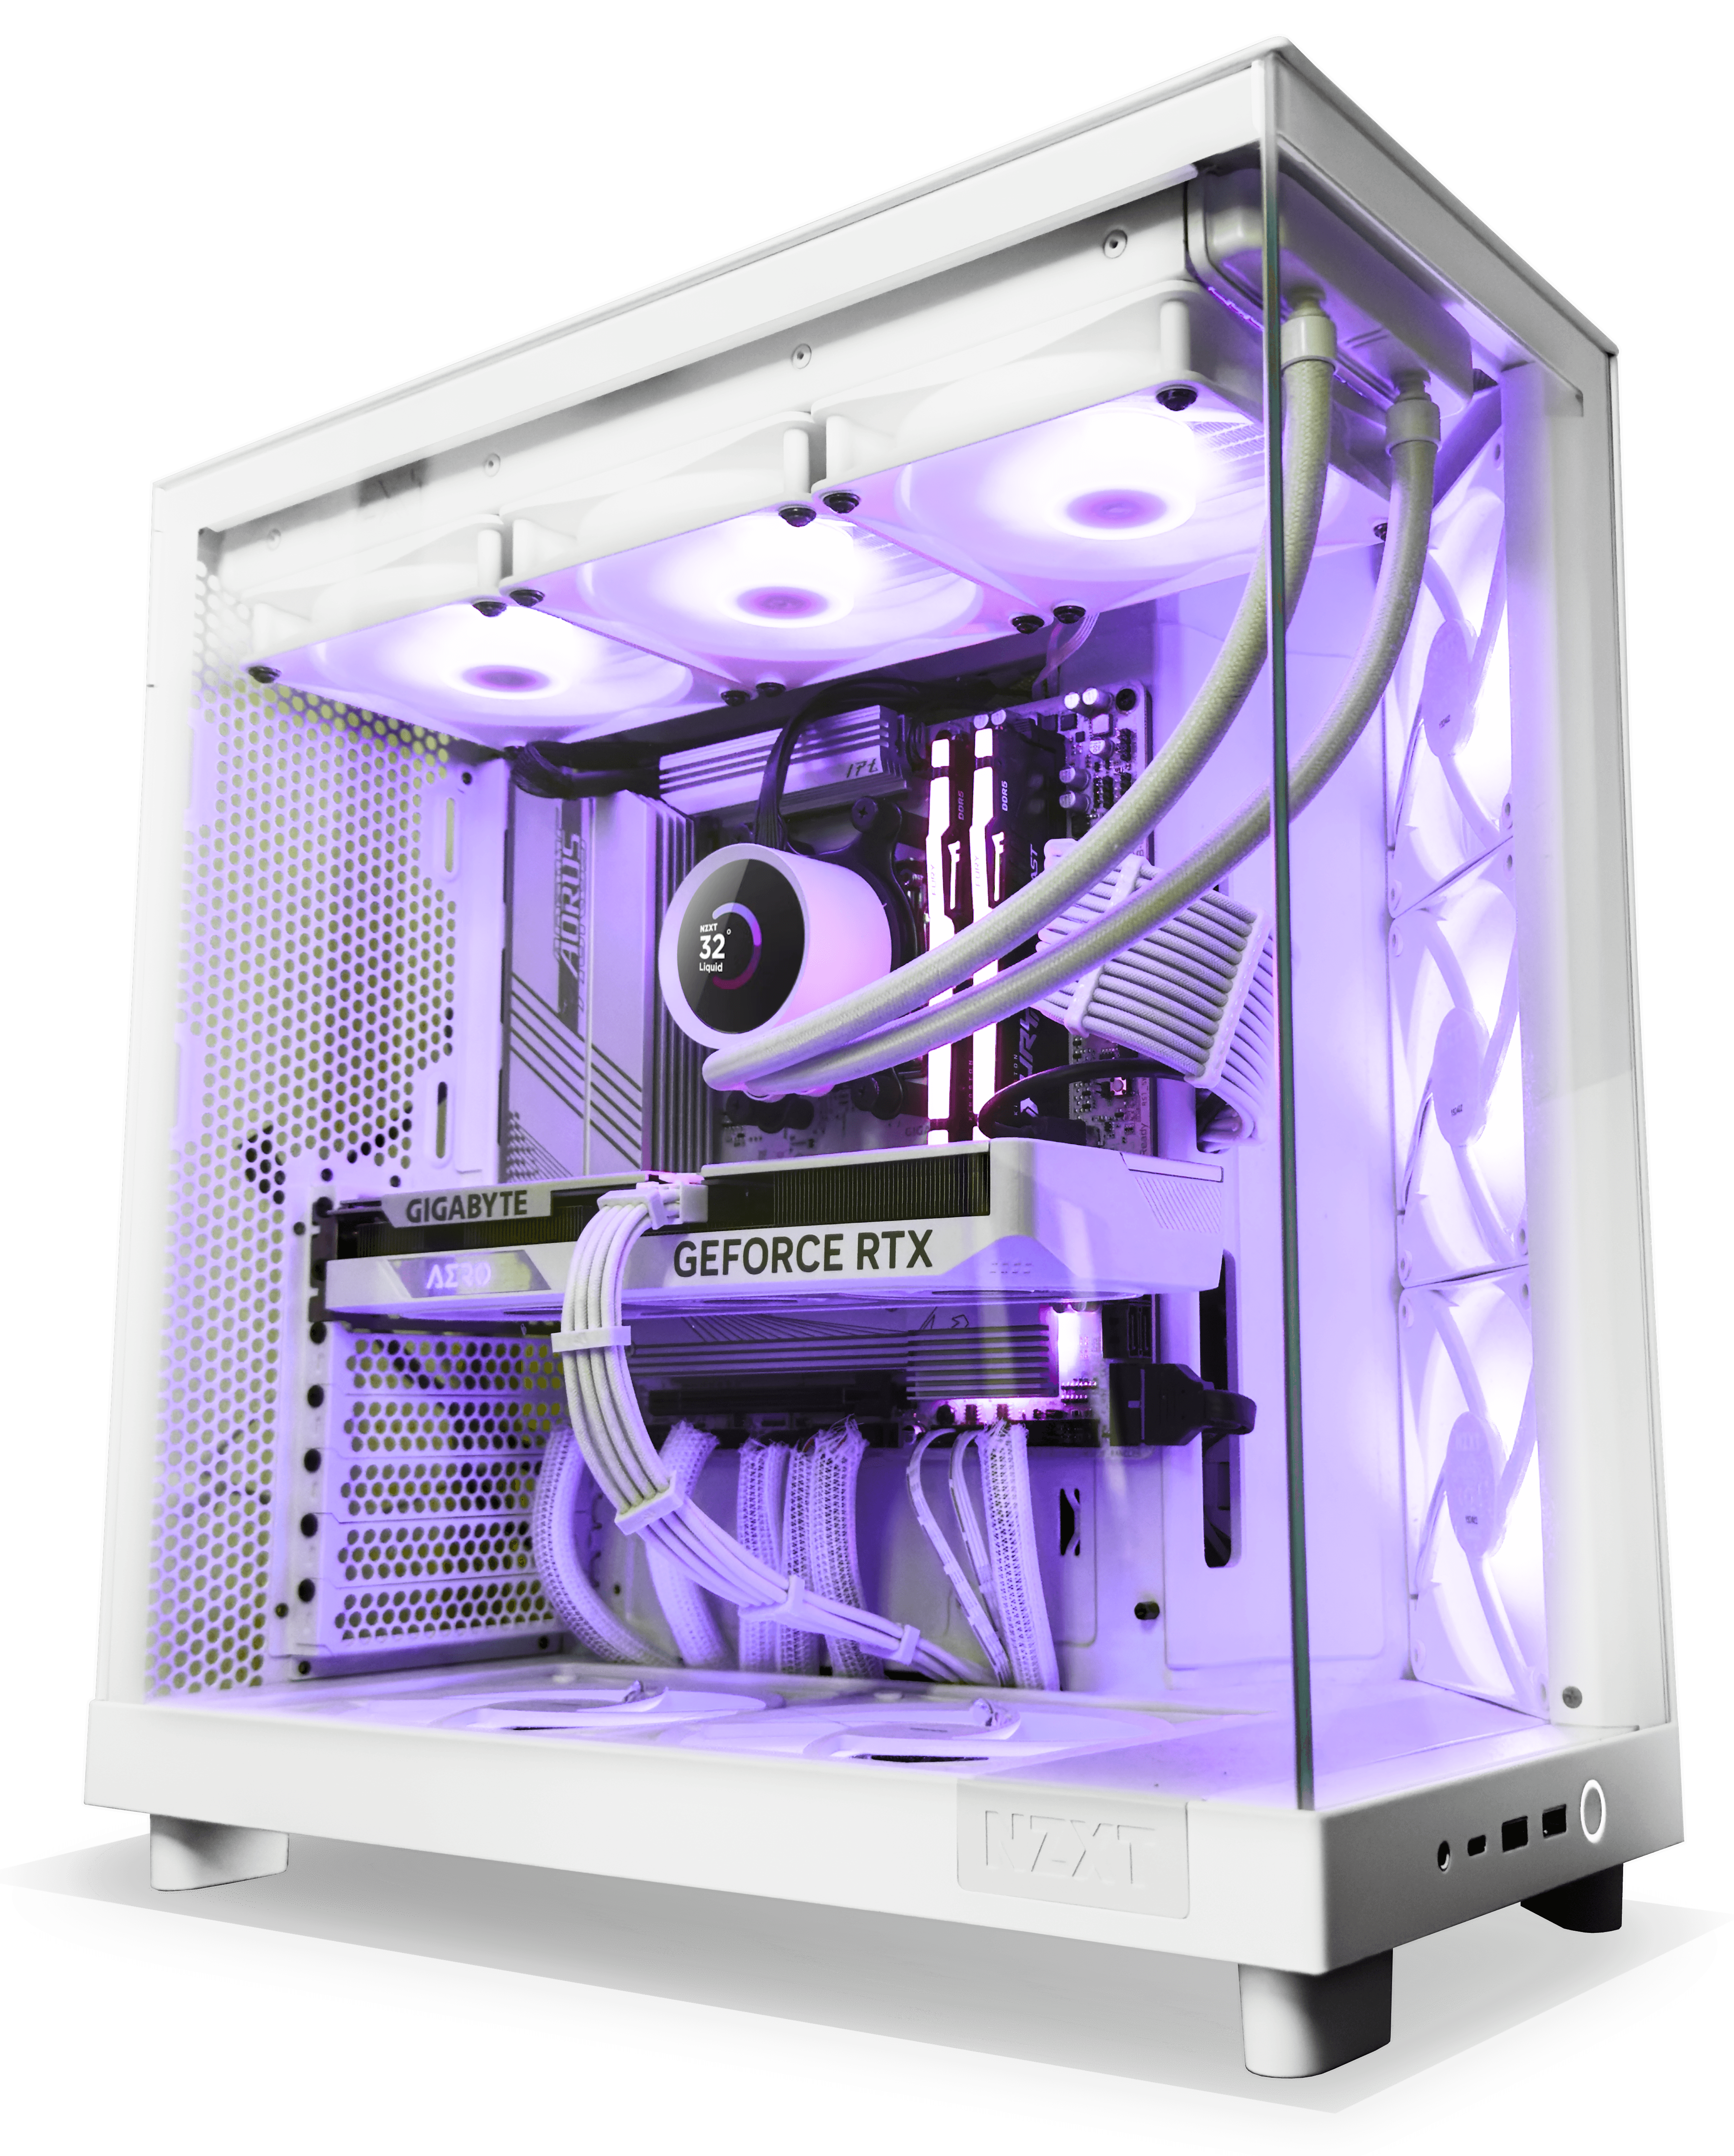
Here’s what you’ll be building: a high-performance, visually stunning PC tailored for both gaming and general use. Featuring premium components and a sleek design, this setup is designed to deliver an exceptional experience.
JVXBuild: Harmony - Balanced Power and Style.
Signature parts:
- NZXT H6 Flow RGB Case
- GeForce RTX 4060 GPU
- AMD Ryzen 5 7600x CPU
- NZXT Kraken AIO Cooler / F140 Bottom RGB Fans
- 16 GB RAM / 1 TB Storage
Before you start 🧐
Before diving into the build process, it's essential to make sure you're fully prepared. Here's what you'll need to do:
Shopping List
Ensure you have all the necessary components and tools for your build. Here's a comprehensive list of the items you'll need:
Use the part lists on the JVX Builds website for convenience:
| Component | Name |
|---|---|
| CPU | AMD Ryzen 5 7600X 4.7 GHz 6-Core Processor |
| GPU | Gigabyte AERO OC GeForce RTX 4060 8 GB Video Card |
| Case | NZXT H6 Flow RGB ATX Mid Tower Case |
| AIO Cooler | NZXT Kraken 360 RGB 78.02 CFM Liquid CPU Cooler |
| Bottom Fans | NZXT F140 RGB 89.48 CFM 140 mm Fans 2-Pack |
| Motherboard | Gigabyte B650 AORUS ELITE AX ICE ATX AM5 Motherboard |
| Memory | Kingston FURY Beast RGB 16 GB (2 x 8 GB) DDR5-6000 CL36 Memory |
| Storage | Western Digital WD_Black SN850X 1 TB M.2-2280 PCIe 4.0 X4 NVME Solid State Drive |
| Power Supply (PSU) | CORSAIR CX550 80 Plus Bronze Non Modular Low-Noise ATX 550 Watt Power Supply - Black |
| Cable Extensions | Asiahorse Customization Mod Sleeve Extension Power Supply Cable Kit |
Double-check that you have each item before proceeding, as missing parts can halt your build in its tracks.
Note: You will also need a Monitor, Keyboard and Mouse. Make sure you either have them or purchase them separately.
Prepare Win11 Bootable USB Flash Drive
To install Windows 11 on your new gaming PC, you’ll need a bootable USB flash drive. For visual guidance on creating a bootable USB stick, refer to the first part in this video:
Tip: There are ways to create a Windows USB installation drive from other operating systems like macOS, but they can be complicated and time-consuming. If you don’t have access to a Windows PC, we recommend taking your USB drive to someone who does and creating the installation drive with their help.
Steps to Create a Bootable Windows 11 USB :
- Search the web for "Download Windows 11" and visit Microsoft's official download page.
- Under "Create Windows 11 Installation Media", click "Download Now" to get the Media Creation Tool.
- Insert a USB flash drive (at least 8GB) into your PC.
- Open the Media Creation Tool and follow the prompts:
- Select "Create installation media (USB flash drive, DVD, or ISO file)".
- Choose your language and Windows 11 edition.
- Select "USB flash drive" as the media type and pick your USB drive from the list.
- Click "Next", and the tool will download Windows 11 and create the bootable USB drive.
- Once the process is complete, safely eject the USB drive.
Your bootable Windows 11 USB is now ready! Keep this around—you will need it after you finish your build.
Purchase a Windows 11 Product Key
Finally, don’t forget to purchase a legitimate Windows 11 product key. This key is crucial for activating your operating system and accessing all features and updates. You can buy a product key directly from Microsoft or from authorized retailers. Keep the key in a safe place until you’re ready to activate Windows during setup.
💡 Tip: Legal Windows 11 product keys are often available at significantly lower prices from reputable online marketplaces. Just make sure you're buying from a trusted seller to avoid any issues. We were able to find a Windows 11 Pro license key for around $ 10.
With these prerequisites taken care of, you’ll be fully equipped to start building your dream gaming PC. Let’s get started!
Build time 🎉🚀
Before you begin assembling your new gaming PC, it's important to take a few steps to ensure both your safety and the protection of your components. Here's how to get ready:
Prepare your workspace
1. Wash and Dry Your Hands
Start by washing your hands thoroughly with soap and water, then dry them completely. Clean hands help prevent oils and dirt from transferring to sensitive components, which could cause damage or affect performance over time.
2. Gather Your Tools
Before getting started, make sure you have a Phillips-head screwdriver on hand. You’ll need it for securing components like the motherboard, power supply, and storage drives.
In the build videos, you'll see us using both a regular screwdriver and an electric one. The electric screwdriver is mainly for convenience—you can absolutely build your PC without it. If you're interested, we’re using the Xiaomi Precision Screwdriver Kit, which is easily available on Amazon.
3. Set Up Your Workspace
Place your PC case on a sturdy, flat surface, such as a table. You might want to use a placemat or a piece of cardboard underneath the case to protect both your table and the case from scratches or damage. This will provide a stable, non-slip surface for your build.
Preparing the Case - 💎 Build Video
Now that your workspace is ready, it's time to prepare the NZXT H6 Flow case for the build. For a detailed visual walkthrough of this chapter follow the step-by-step instructions in the video above.
About the Case
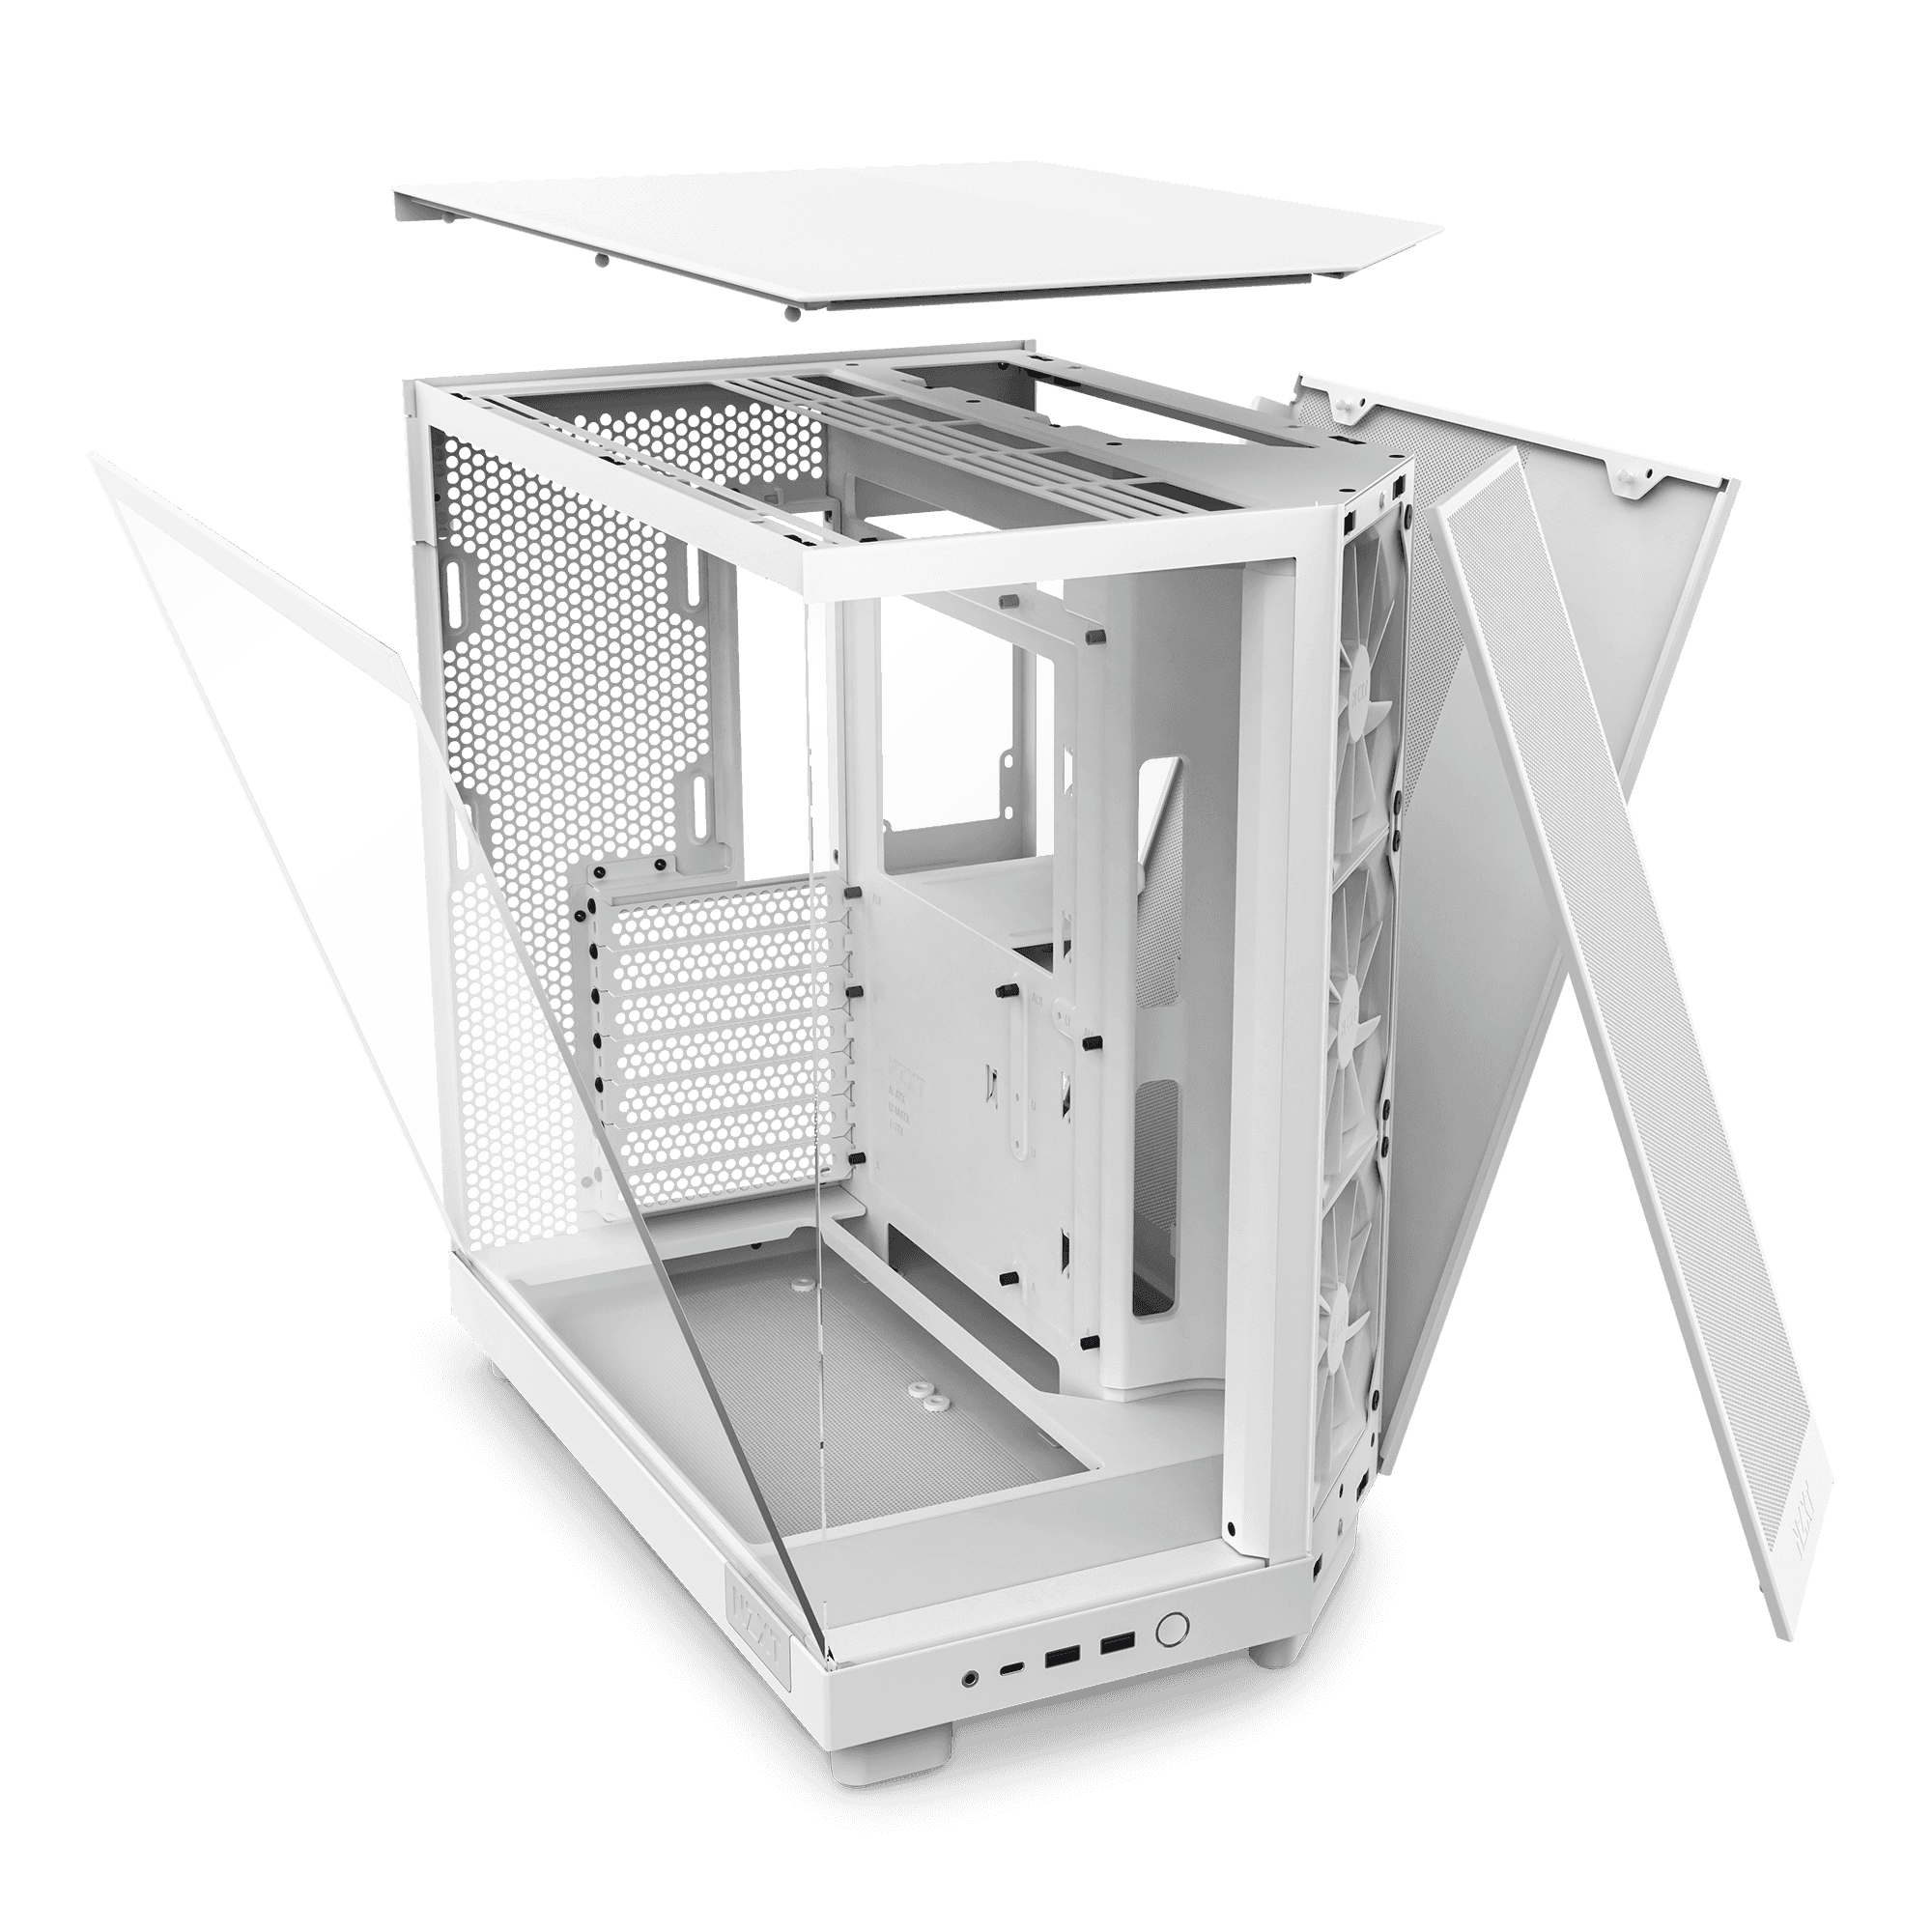
The NZXT H6 Flow RGB is an ATX mid-tower case designed for optimal airflow, aesthetics, and ease of building. With a dual-chamber layout, panoramic glass design, and pre-installed RGB fans, it balances function and style for modern gaming setups.
Key Highlights
- Optimized Airflow – Includes three pre-installed 120mm RGB fans and a spacious interior for efficient cooling.
- Dual-Chamber Layout – Keeps cables and the PSU neatly tucked away for a clean and organized build.
- Panoramic Glass Panel – Three-sided tempered glass design showcases your components from multiple angles.
- Compact Yet Spacious – Supports ATX, Micro-ATX, and Mini-ITX motherboards while maintaining a small footprint.
- Versatile Cooling Support – Accommodates 360mm radiators and multiple fan configurations for high-performance cooling.
With its modern aesthetics, strong cooling performance, and builder-friendly design, the NZXT H6 Flow RGB is an excellent choice for a high-performance and visually striking PC build.
As a first step in your PC Build, let's get the NZXT H6 Flow RGB case ready! We’ll start by removing a few panels so you have easy access to the interior. This will allow installing components and managing all the cables keeping them out of view where possible. Take your time and handle everything carefully—especially the tempered glass—to keep your case looking pristine!
Removing the Side Panel
The side panel features a tempered glass window that showcases your build.
-
Loosen the Thumb Screw: Locate the thumb screw at the back of the case securing the side panel and loosen it by hand.
-
Detach the Panel: Gently pull the panel towards you to detach it from the case.
-
Store the Panel Safely: Carefully place the removed panel in a secure location to prevent any damage.
Removing the Top Panel
Detaching the top panel allows for easier installation of top-mounted fans or radiators.
-
Push to Release: The top panel is designed for tool-free removal. Simply push it upward from within the case to detach it.
-
Lift Off: Once disengaged, lift the panel away and set it aside safely.
Removing the Back Panel
Accessing the back panel is crucial for effective cable management.
-
Loosen the Thumb Screw: Similar to the side panel, locate and loosen the thumb screw at the back securing the back panel.
-
Remove the Panel: Pull the panel away from the case and store it securely.
Removing the Front Panel
The front panel provides access to front fan mounts and enhances airflow.
-
Remove Screws: Using a screwdriver, remove the three screws at the top and the two screws on the side of the front panel.
-
Detach the Panel: Gently pull the front panel away from the case and set it aside carefully.
Removing the Accessory Box
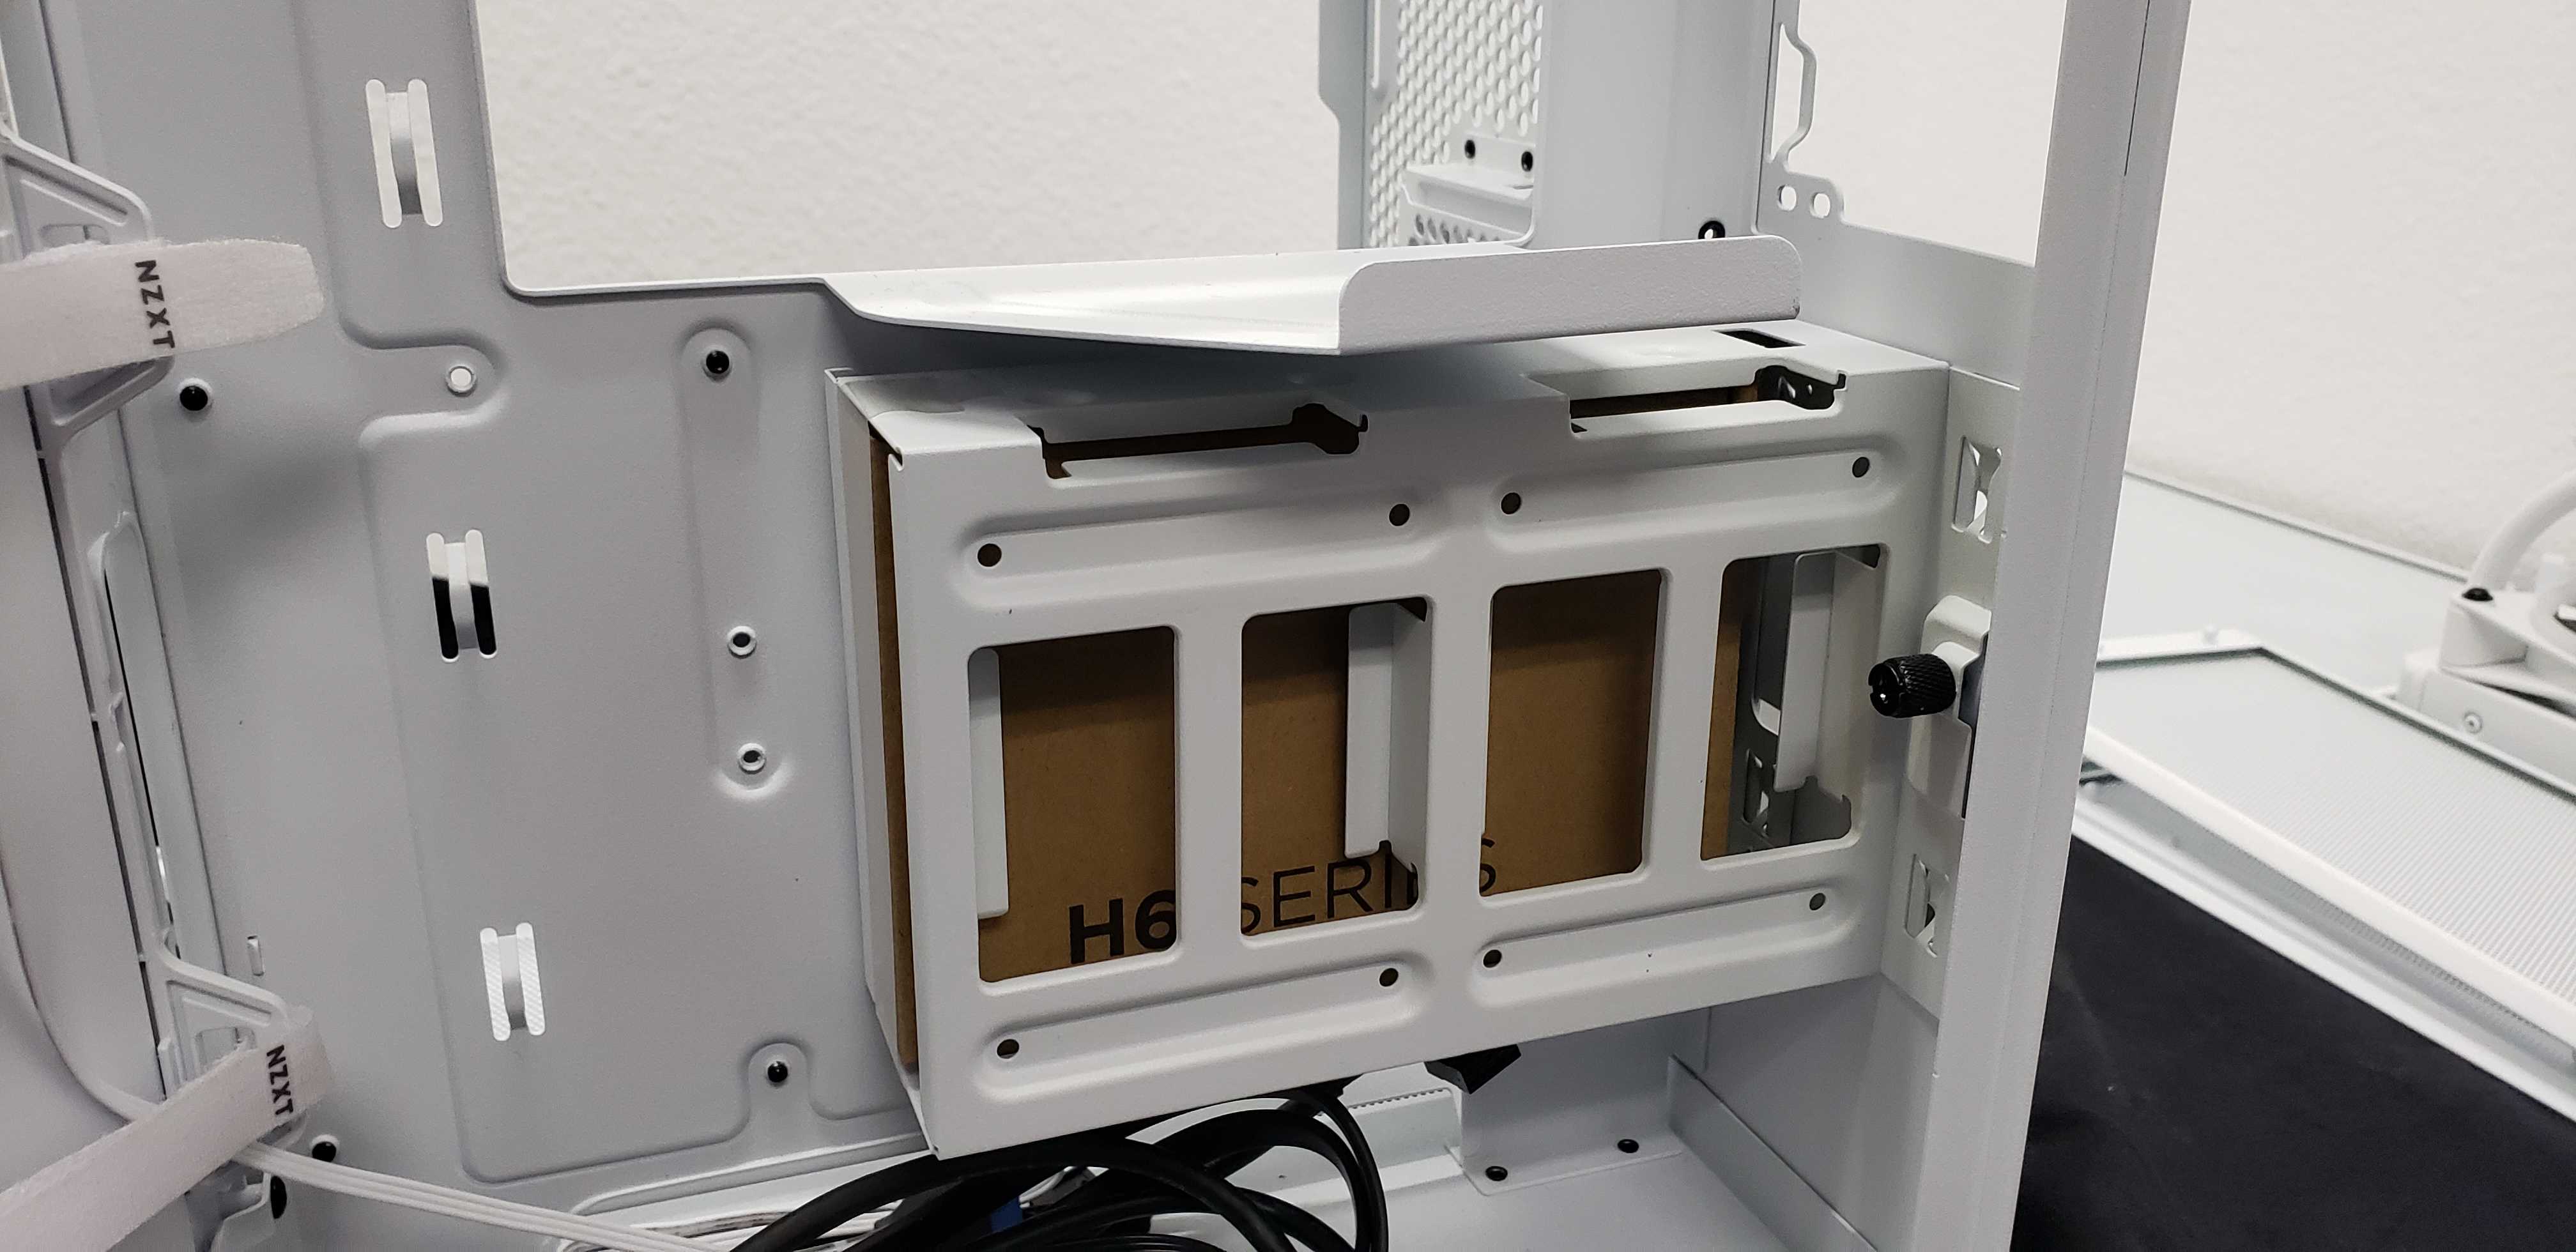
Inside the case, there's an accessory box containing screws and other components necessary for the build.
-
Locate and Remove: Find the cardboard accessory box inside the case and remove it.
-
Store for Later Use: Keep this box in a safe place; it contains screws and accessories you'll need during assembly.
By following these steps, your NZXT H6 Flow RGB case will be ready for component installation, ensuring a smooth and organized building experience.
Installing the CPU, RAM & SSD - 💎 Build Video
Before we dive in, let’s go over what these components do and why they are essential for your PC build:
- CPU (Central Processing Unit) – The brain of your computer, responsible for executing instructions and running applications. A powerful CPU ensures smooth performance in gaming, content creation, and everyday tasks.
- RAM (Random Access Memory) – A high-speed temporary memory that stores active data for quick access. More RAM means better multitasking and faster game loading times.
- SSD (Solid State Drive) – Your main storage device. Unlike traditional hard drives, SSDs have no moving parts, making them much faster, quieter, and more reliable.
Handle with Care
These components are delicate. Always hold them by the edges, avoiding the gold contacts or pins. To make installation easier, we will install these components outside the case before mounting the motherboard. This gives us more space to work and reduces the risk of damaging parts inside the case.
Installing the CPU
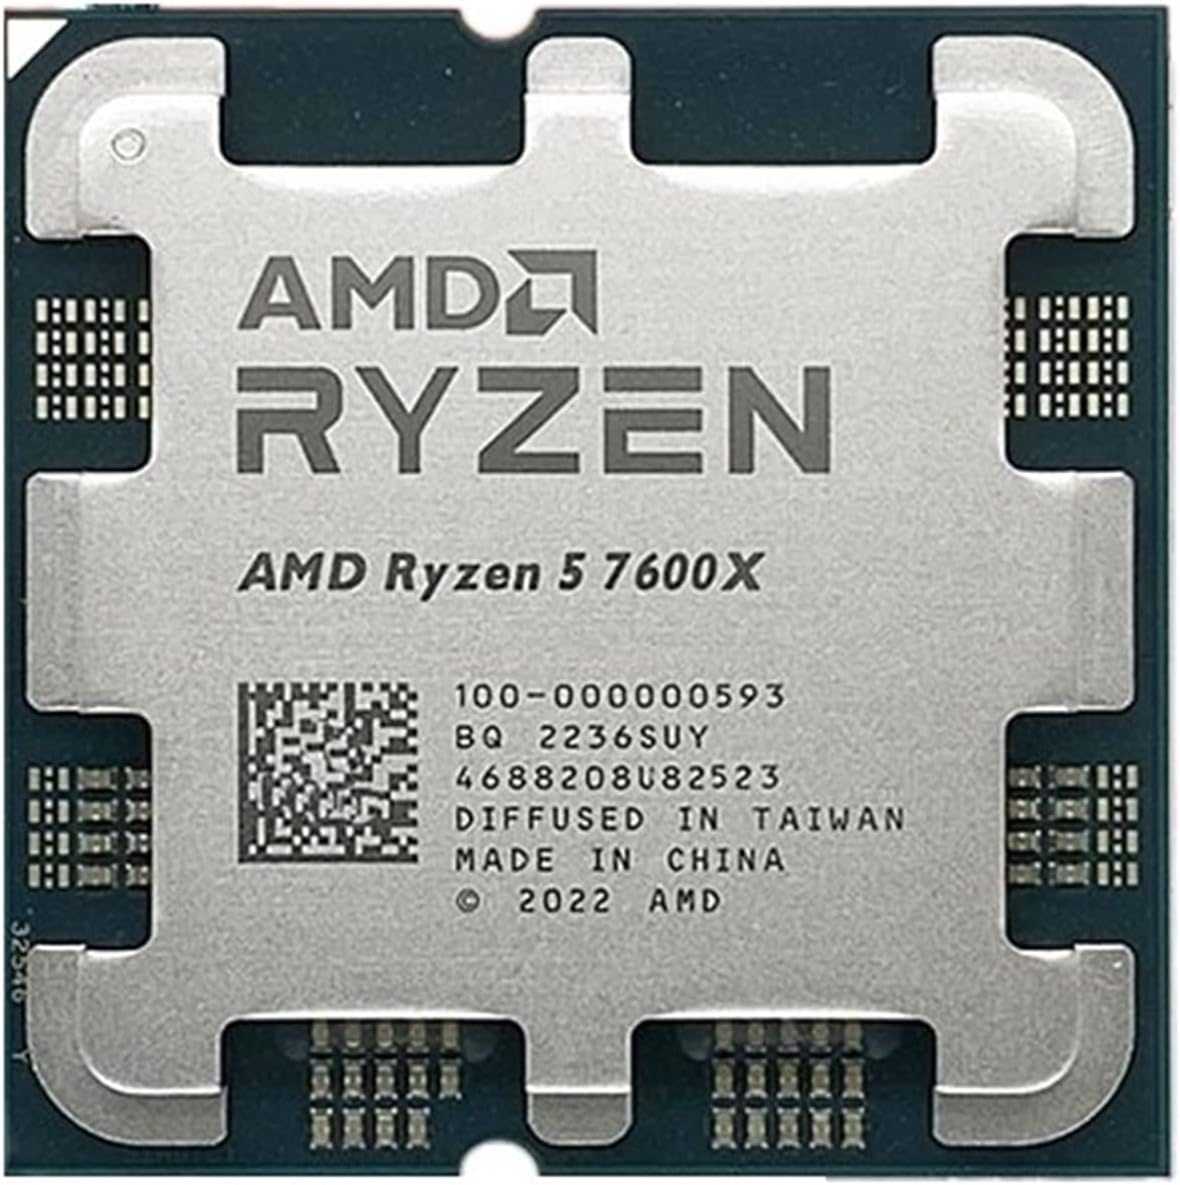
Installing the CPU is a crucial step in your build. Proper handling ensures optimal performance and prevents damage. Follow these steps to install the AMD Ryzen 5 7600X correctly.
About the CPU
We're using the AMD Ryzen 5 7600X 4.7 GHz 6-Core Processor, an AM5 CPU that pairs perfectly with the Gigabyte B650 AORUS ELITE AX ICE motherboard.
Key Strengths
- 6 Cores & 12 Threads – Handles gaming, streaming, and multitasking effortlessly.
- Blazing Fast Speeds – Boosts up to 5.3 GHz, keeping your system responsive.
- Future-Proof – Supports PCIe 5.0 & DDR5, ensuring top-tier performance for years to come.
Unbox the Motherboard
Carefully open the packaging for the GIGABYTE B650M A ELITE AX ICE motherboard. Inside, you’ll find the motherboard itself, along with any included accessories such as cables, screws, and the user manual. Take a moment to review the contents and ensure everything is accounted for before proceeding.
- Hold the motherboard by its edges to avoid touching sensitive components.
- Avoid placing it on static-prone surfaces like carpet.
- Tip: If you don’t have an anti-static mat, place the motherboard on top of its box while preparing for installation.
Unbox and Handle the CPU
Carefully unbox the AMD Ryzen 5 7600X and handle it only by the edges. Avoid touching the bottom side, as the pins are delicate and can be easily bent.
Open the CPU Socket
Locate the CPU socket on your GIGABYTE B650M A ELITE AX ICE motherboard. You'll see a small metal lever next to the socket. Gently lift this lever to open the socket, which will allow you to insert the CPU.
Position and Install the CPU
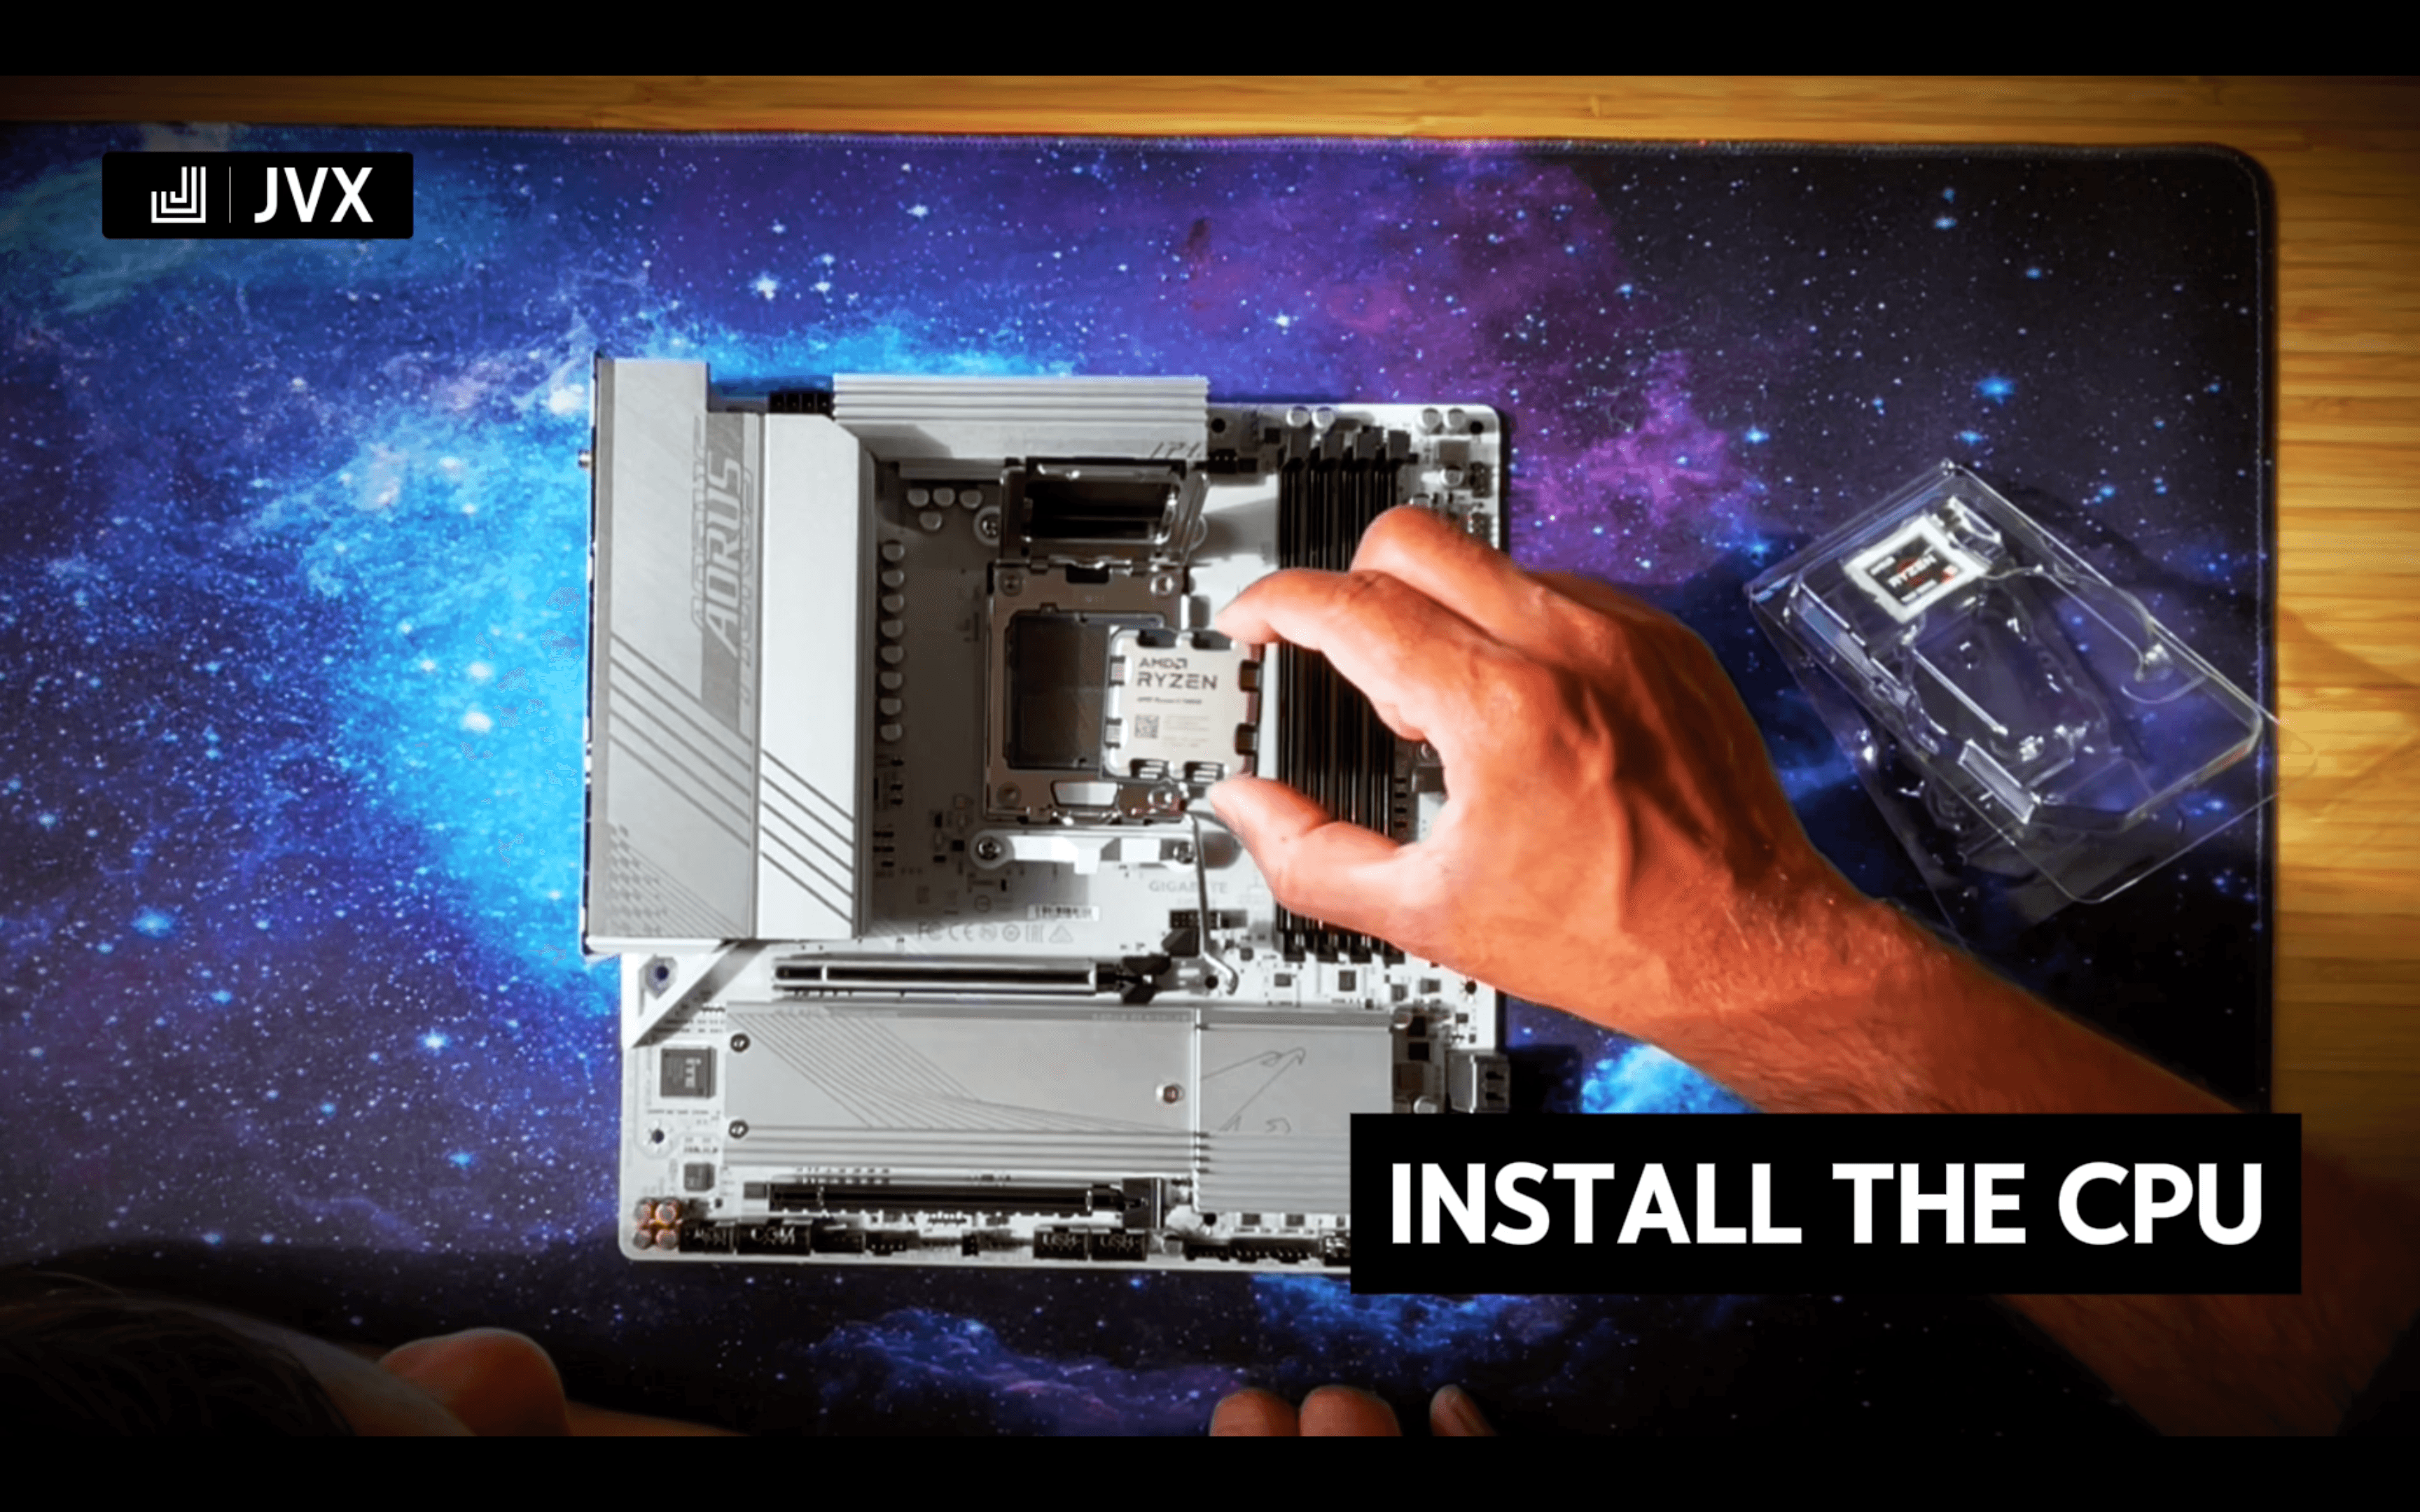
Next, align the small triangle on one corner of the CPU with the corresponding triangle on the motherboard’s CPU socket. This ensures the CPU is oriented correctly and will fit properly into the socket.
Gently lower the CPU straight down into the socket. Do not press it in—if aligned correctly, the CPU should naturally drop into place without any force. Once it’s seated, double-check that the CPU is flush with the socket.
Secure the CPU
Finally, gently lower the socket lid back down over the CPU and press the lever to secure it. As you do this, you’ll notice the plastic cover on the socket will pop off—this is normal and indicates that the CPU is properly installed. Your CPU is now installed! 🎉 This powerful processor will deliver smooth performance for gaming, productivity, and more.
Installing the Memory (RAM)
Installing RAM is a straightforward process, but it's important to handle the modules carefully to avoid static damage. Follow these steps to install the Kingston FURY Beast RGB DDR5-6000 memory correctly.
About the RAM
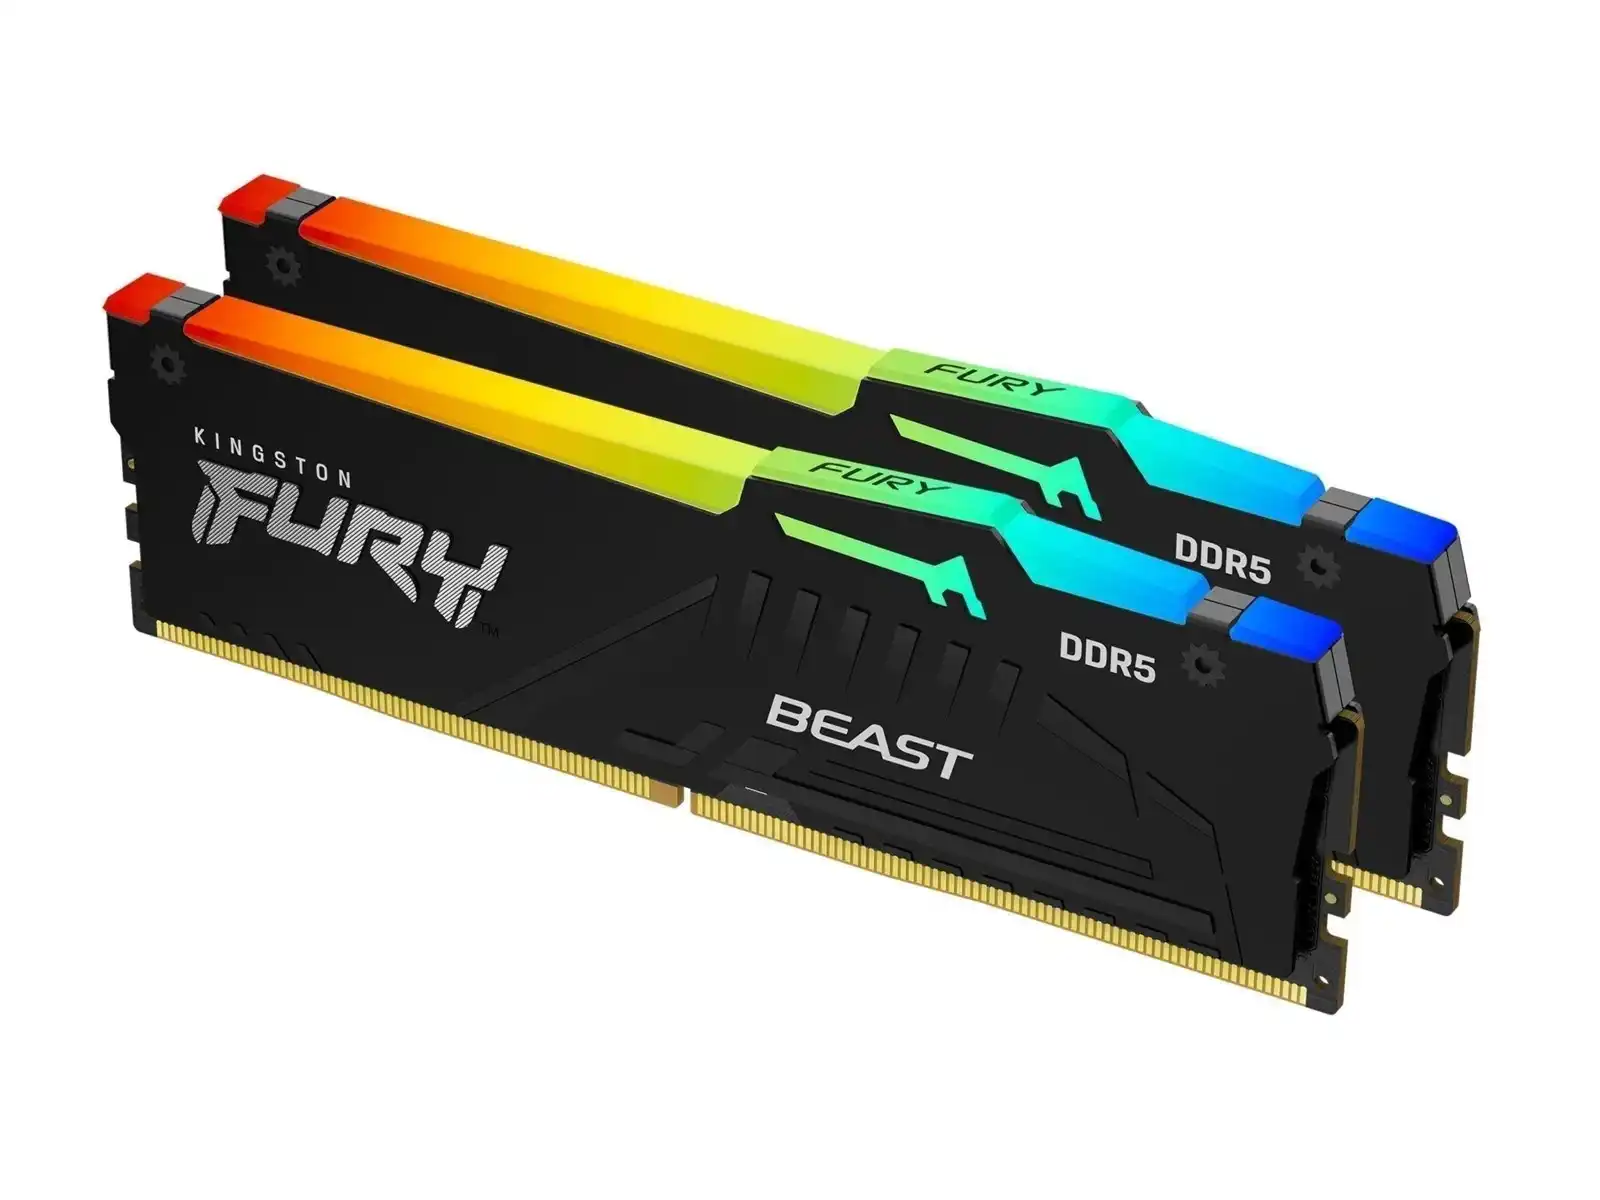
We're installing Kingston FURY Beast RGB 16 GB (2 x 8 GB) DDR5-6000 CL36 Memory, a high-performance DDR5 kit designed for speed and reliability.
Key Strengths
- 6000 MT/s Speed – Delivers ultra-fast performance for gaming and content creation.
- Dual-Channel Performance – Optimized for better stability and efficiency.
- RGB Lighting – Customizable lighting effects to match your build’s aesthetic.
Unbox the Memory Modules
Carefully unbox the Kingston FURY Beast RGB DDR5-6000 memory and handle it by the edges. Avoid touching the gold connectors to prevent static discharge or contamination.
Use the Correct Slots
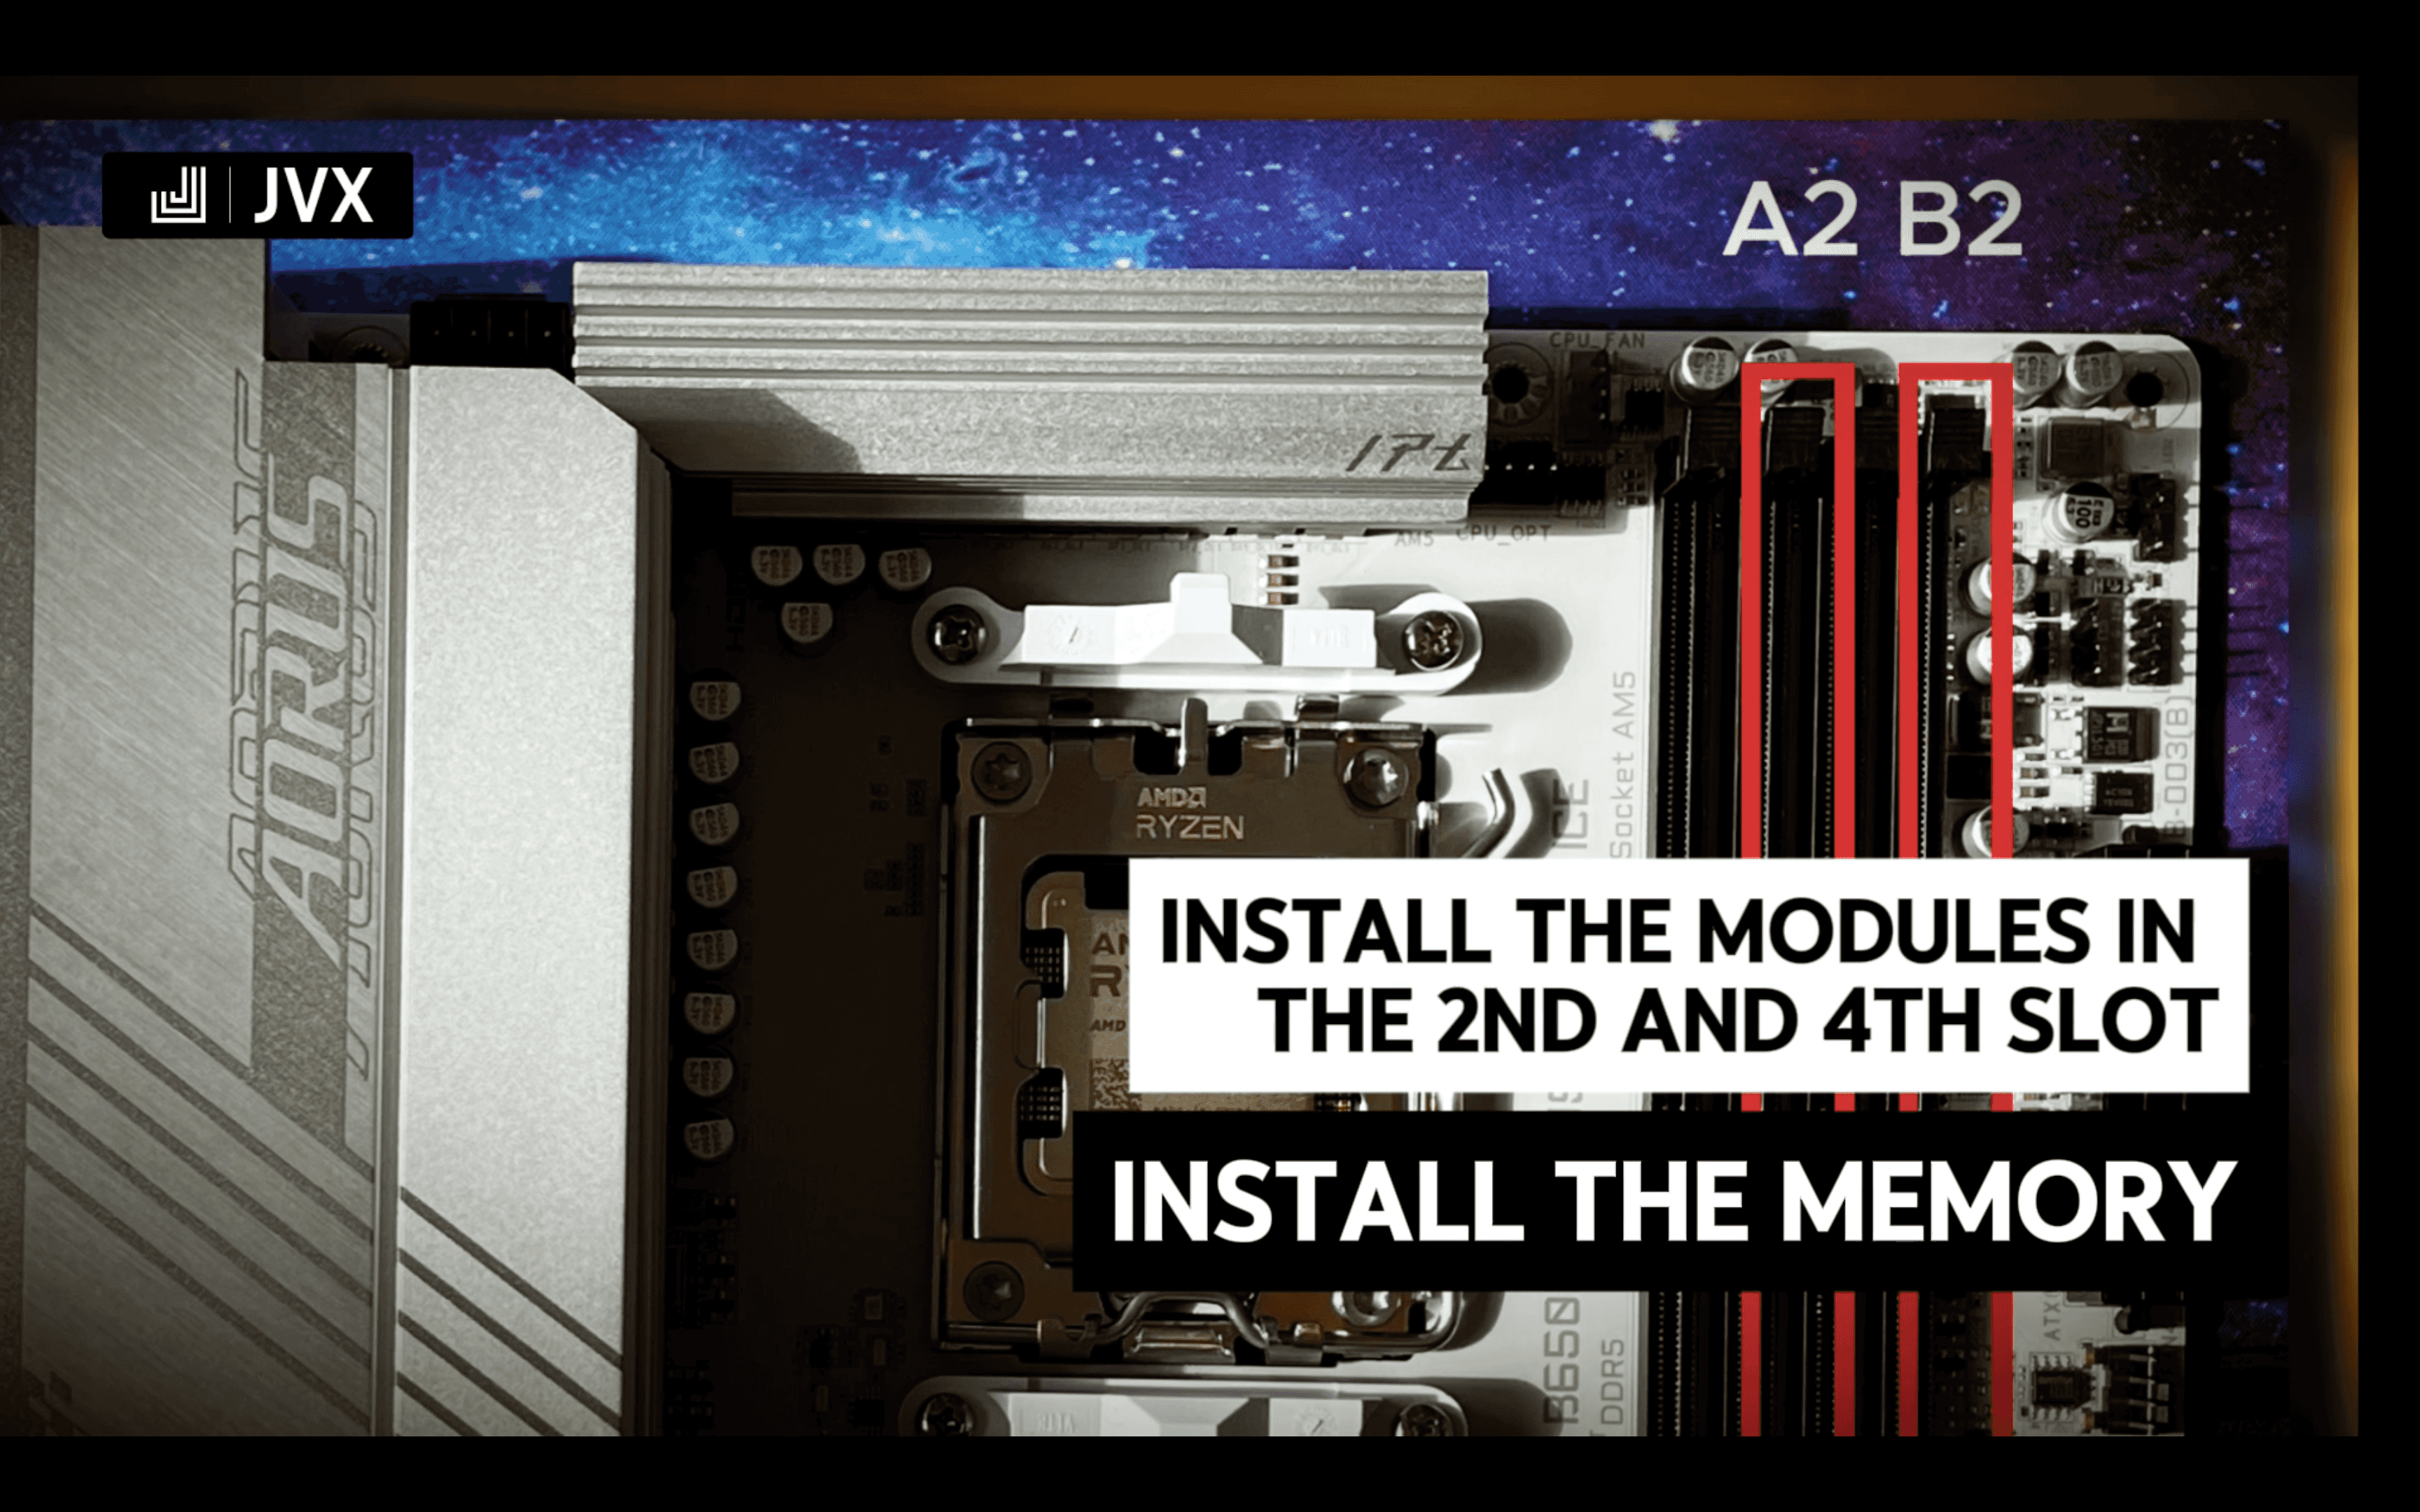
Your motherboard has four RAM slots, and for the best performance, the memory should be installed in slots 2 and 4 (counting from the left). This ensures the RAM runs in dual-channel mode, maximizing speed and efficiency.
Prepare the RAM Slots
Before installing the memory, push down the clips at the ends of the RAM slots to open them. These clips will automatically lock the RAM in place once inserted.
Install the First Memory Module
Hold the module by the edges and align the notch on the module with the gap in the RAM slot. Gently but firmly press the module down until it clicks into place. The clips should automatically snap shut, securing the RAM.
Install the Second Memory Module
Repeat the process for the second memory module, ensuring it is inserted in the correct slot and properly seated.
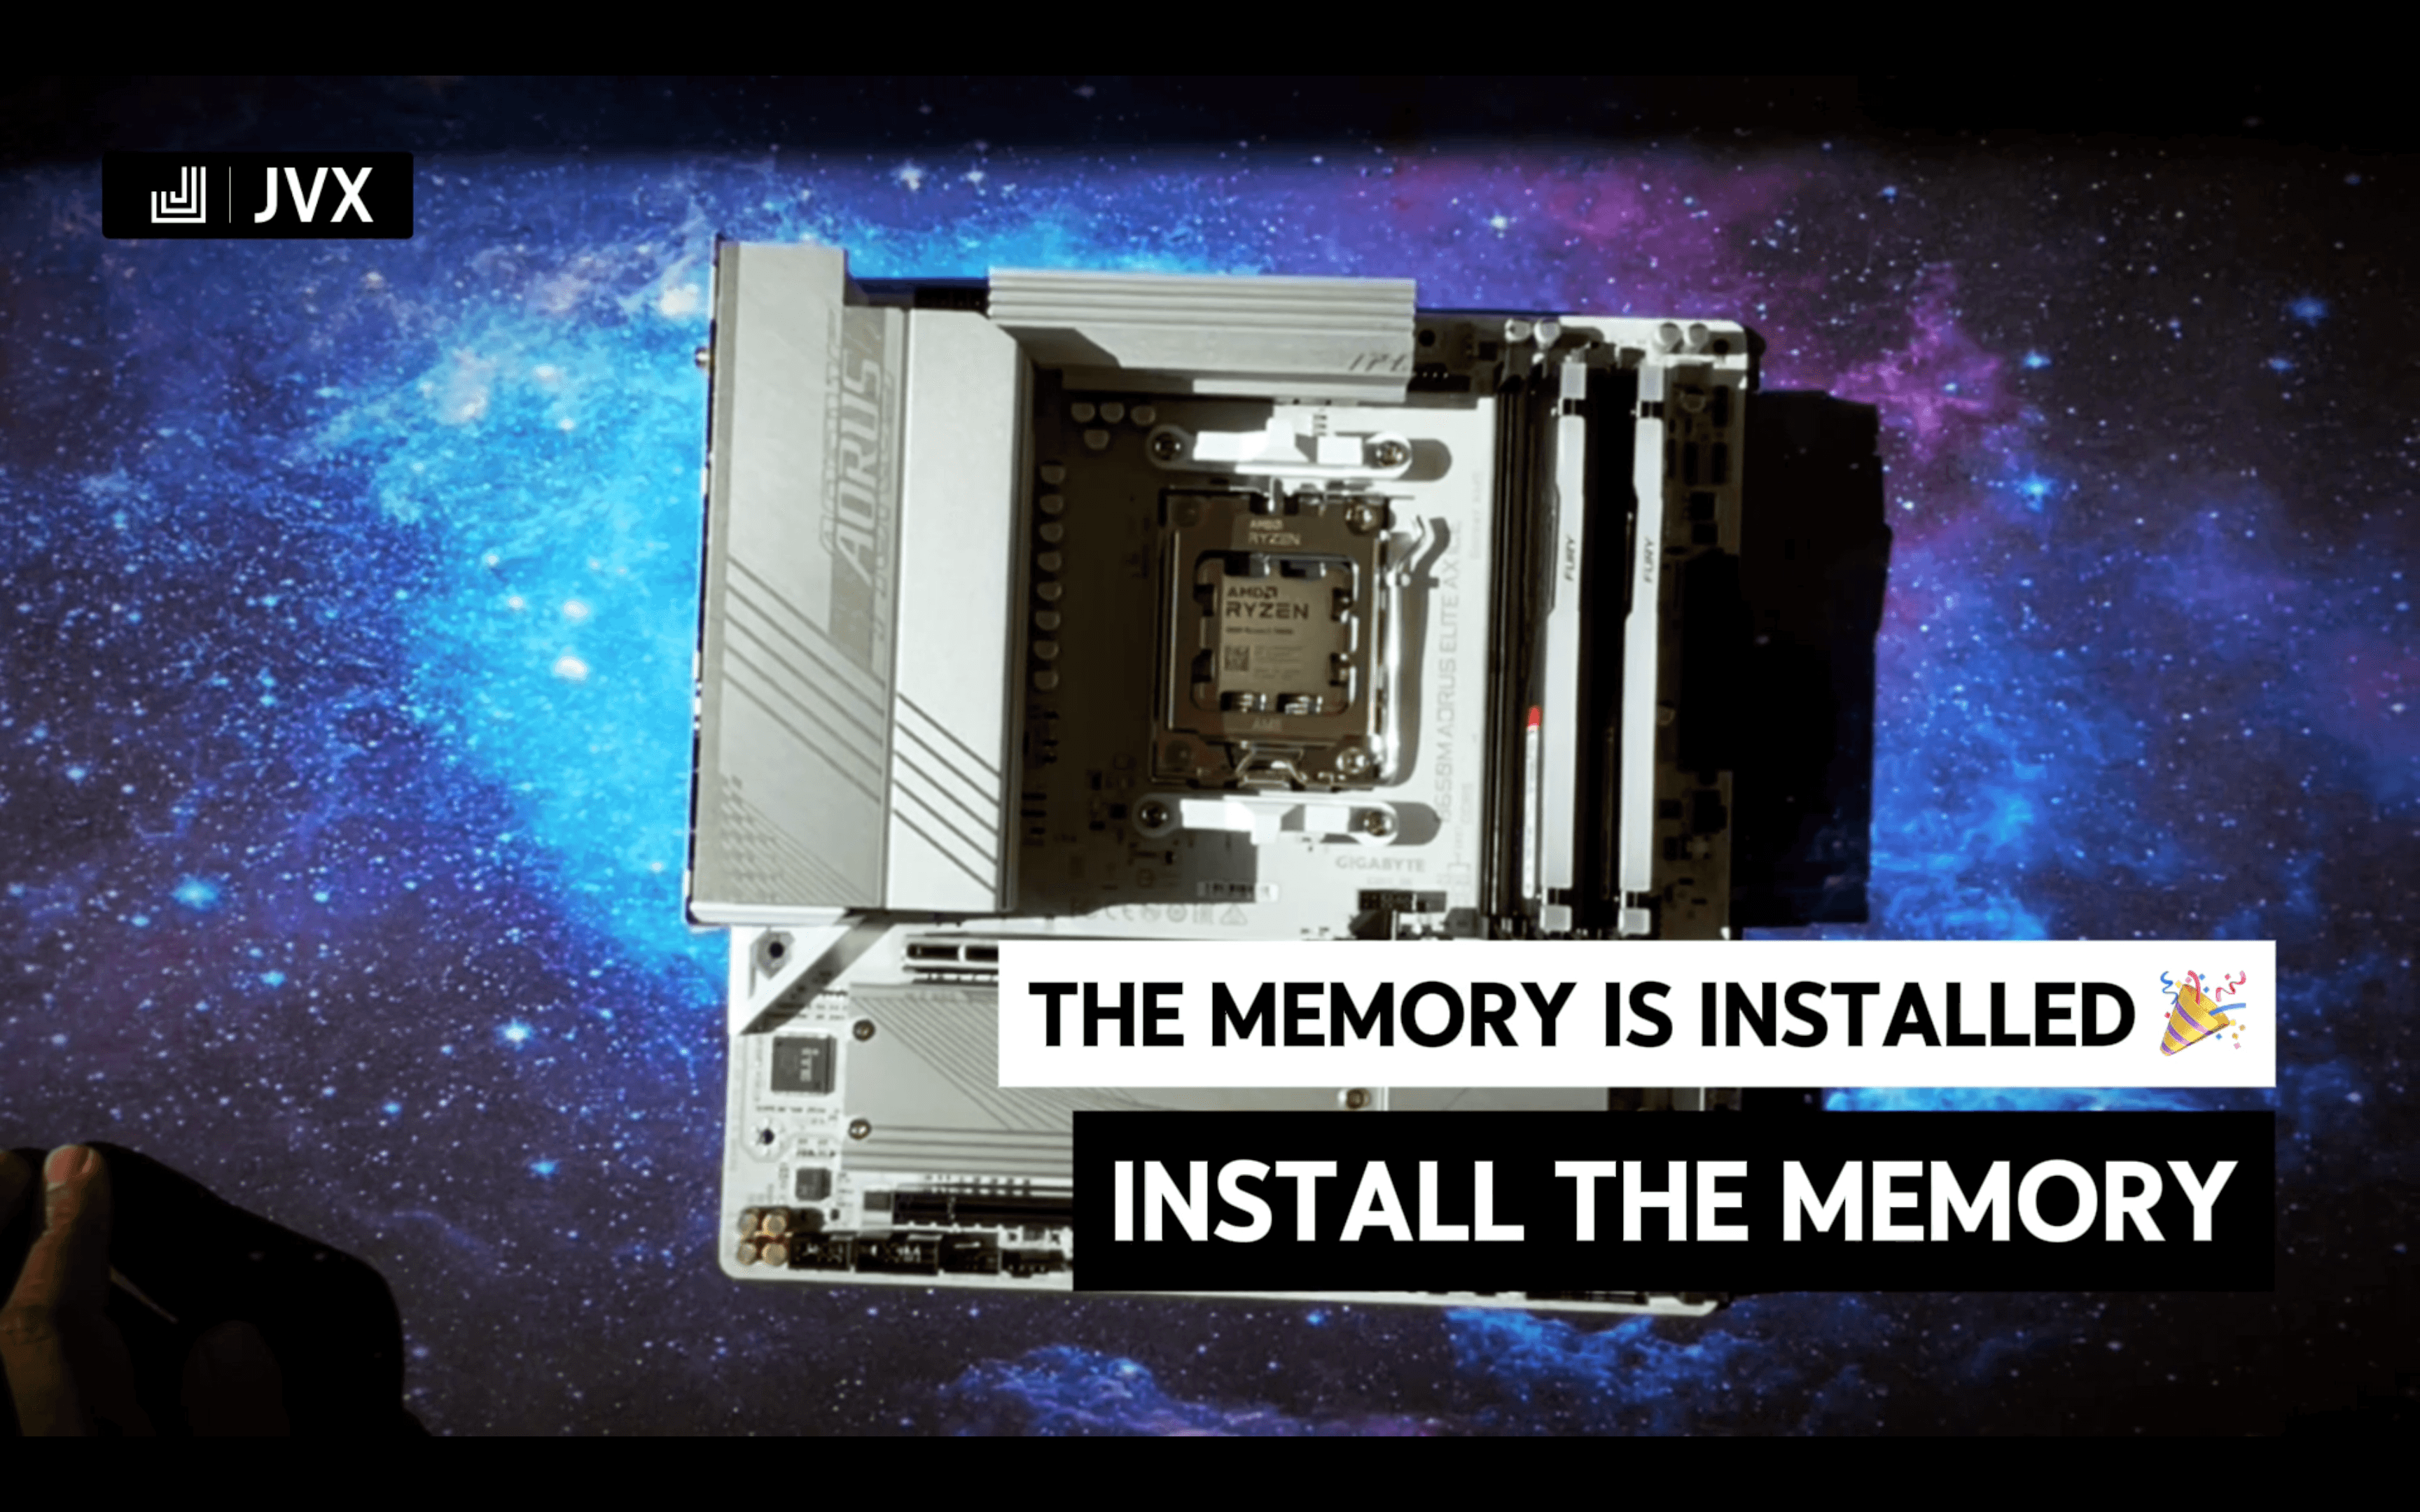
Your RAM is now installed! 🎉 With dual-channel memory in place, your system will benefit from faster load times, improved multitasking, and a smoother overall experience.
Installing the SSD
Installing your M.2 SSD is a simple but crucial step in your build. Proper installation ensures optimal performance and longevity. Follow these steps to install the WD_BLACK SN850X SSD correctly.
About the SSD
We're using the Western Digital WD_Black SN850X 1 TB M.2 NVMe SSD, one of the fastest storage solutions available.
Key Strengths
- Ultra-Fast PCIe 4.0 Speeds – Read speeds up to 7,300 MB/s, dramatically reducing load times.
- Compact & Efficient – The M.2 form factor saves space and eliminates unnecessary cables.
- Optimized for Gaming – Reduces stutter and improves asset streaming in modern games.
Unbox the SSD
Carefully unbox your WD_BLACK SN850X SSD and handle it by the edges. Avoid touching the gold contacts to prevent static discharge or contamination.
Remove the M.2 Heatsink
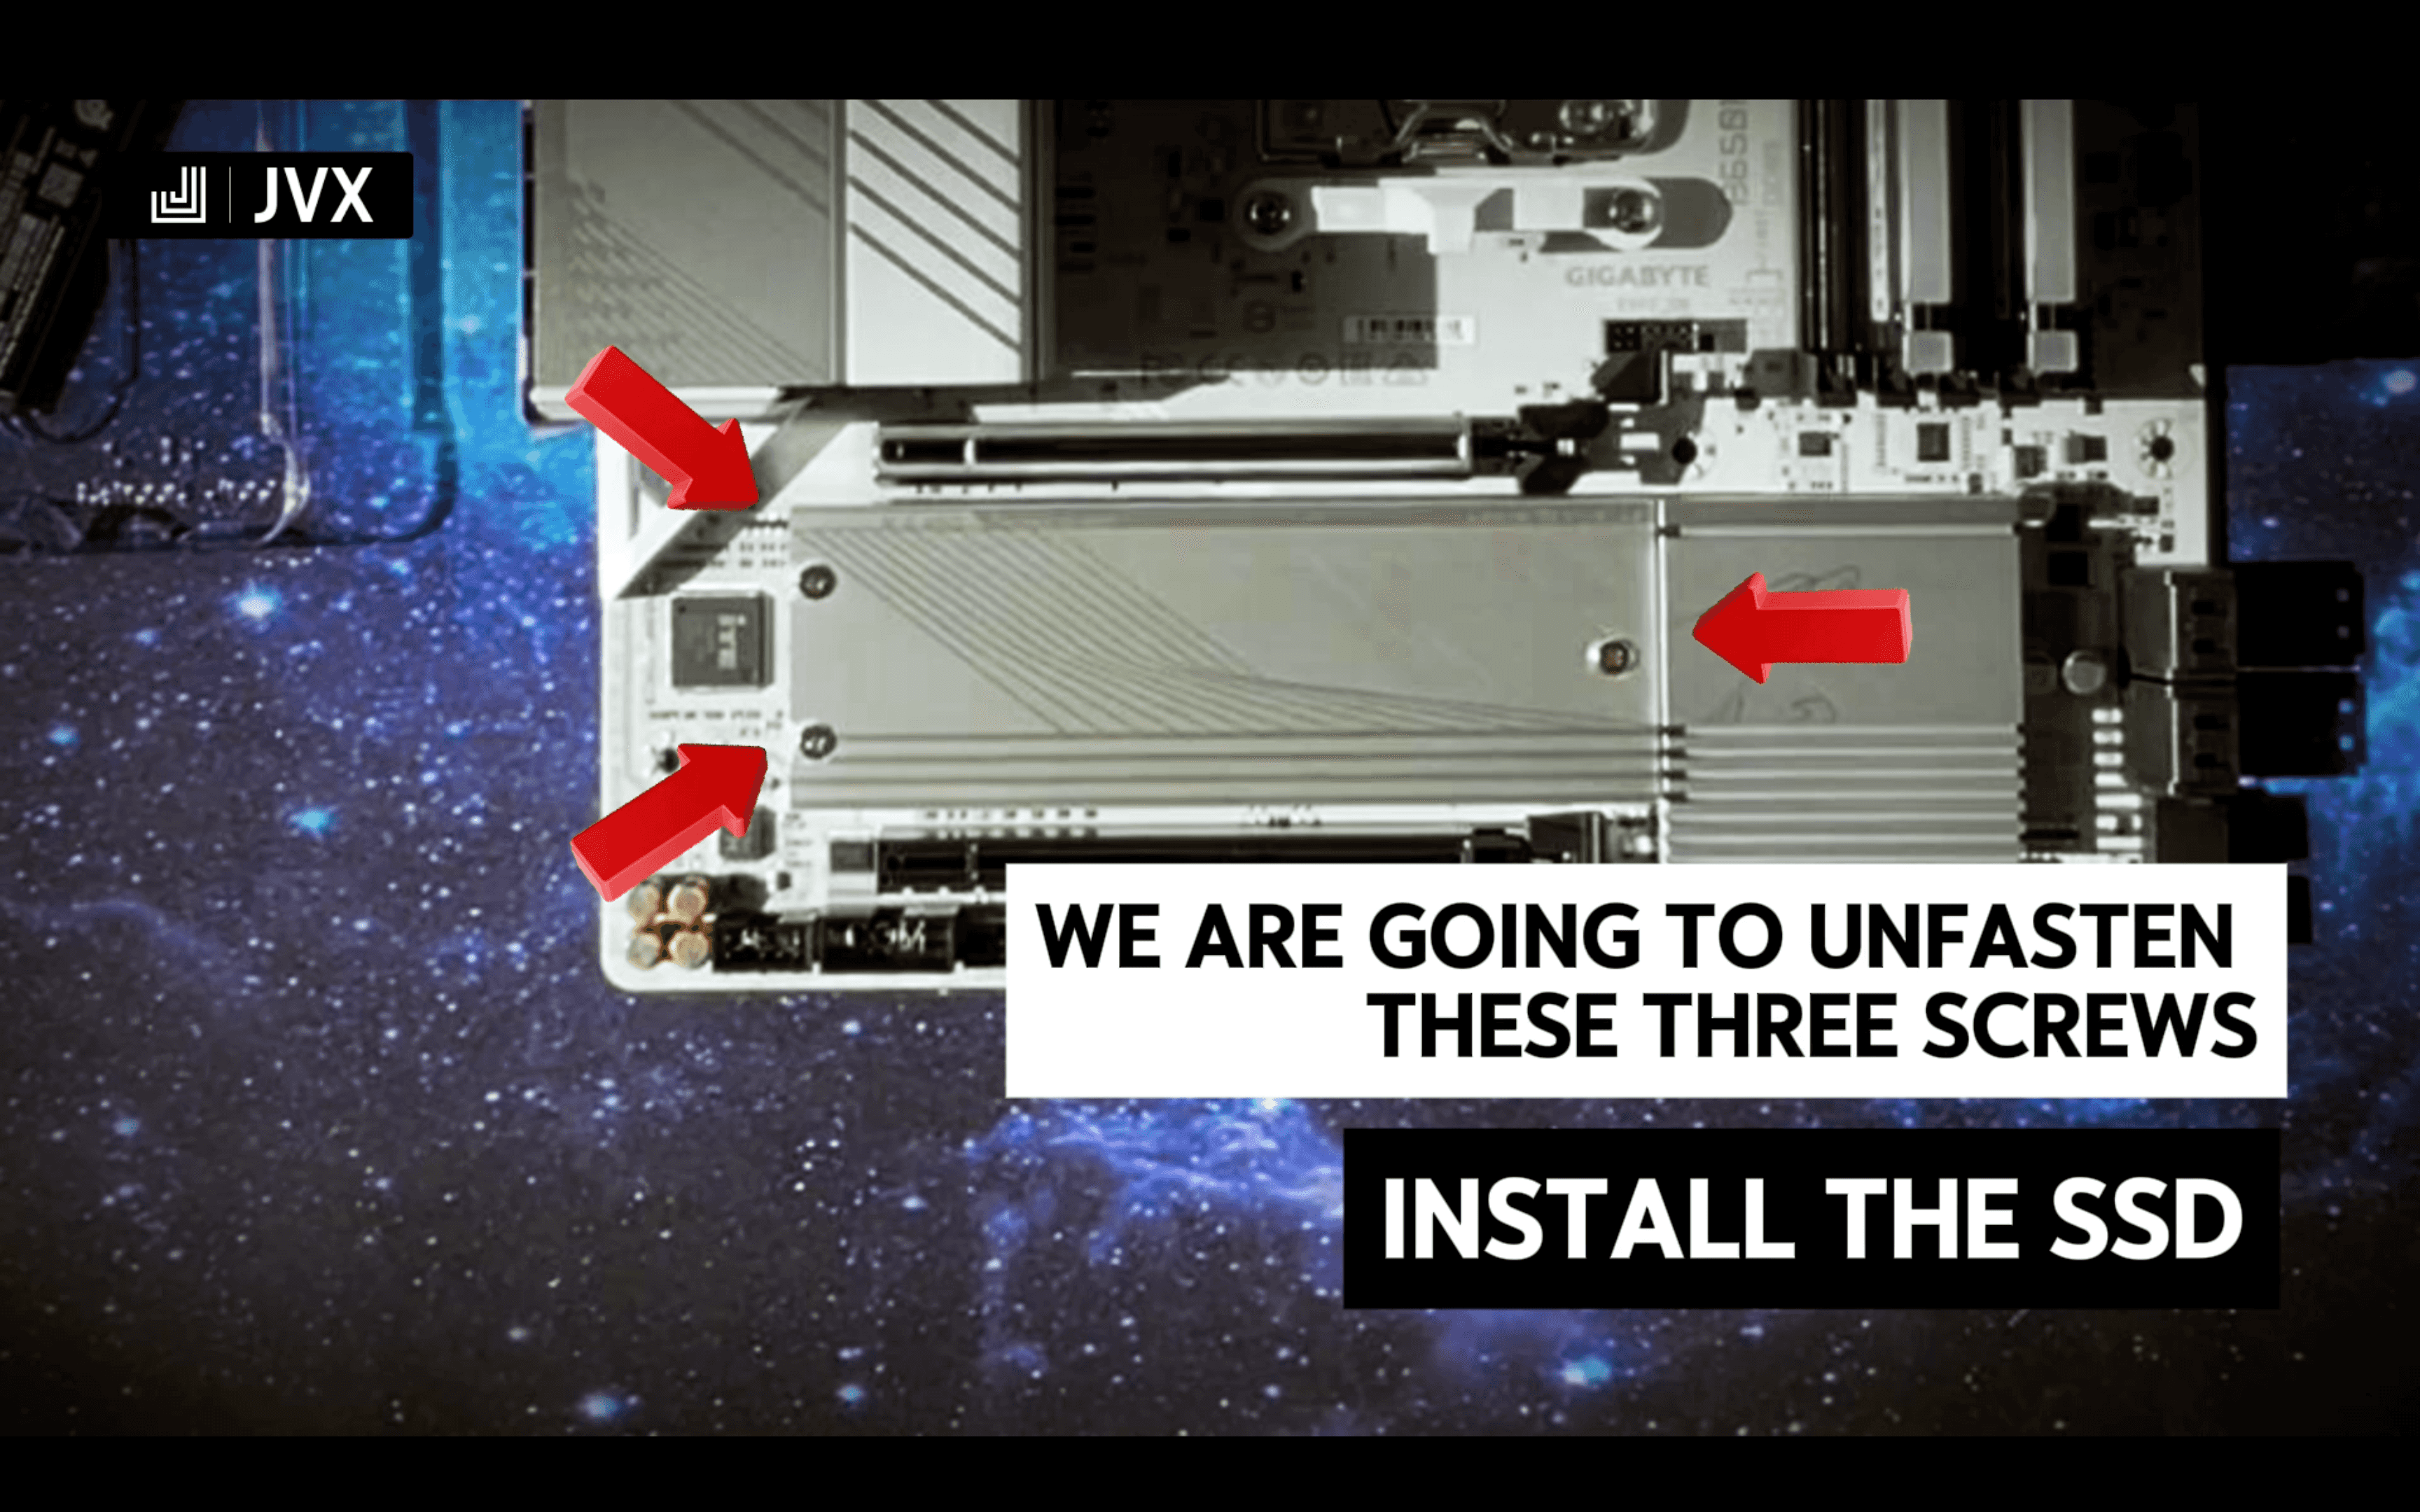
Locate the top M.2 slot on your Gigabyte B650 AORUS ELITE AX ICE motherboard, which is the one closest to the CPU. Using a screwdriver, unscrew the three screws securing the M.2 heatsink, then carefully lift the heatsink off and set it aside.
Prepare the Thermal Pad
On the underside of the heatsink, you’ll find a thermal pad designed to help dissipate heat from the SSD. Remove the protective film from the thermal pad closest to the CPU, ensuring proper heat transfer when the heatsink is reattached.
Insert the SSD into the M.2 Slot
Hold the SSD by the edges and align the gold connector with the M.2 slot. Insert the SSD at a 30-degree angle and gently push it in until it is fully seated in the connector.
Secure the SSD
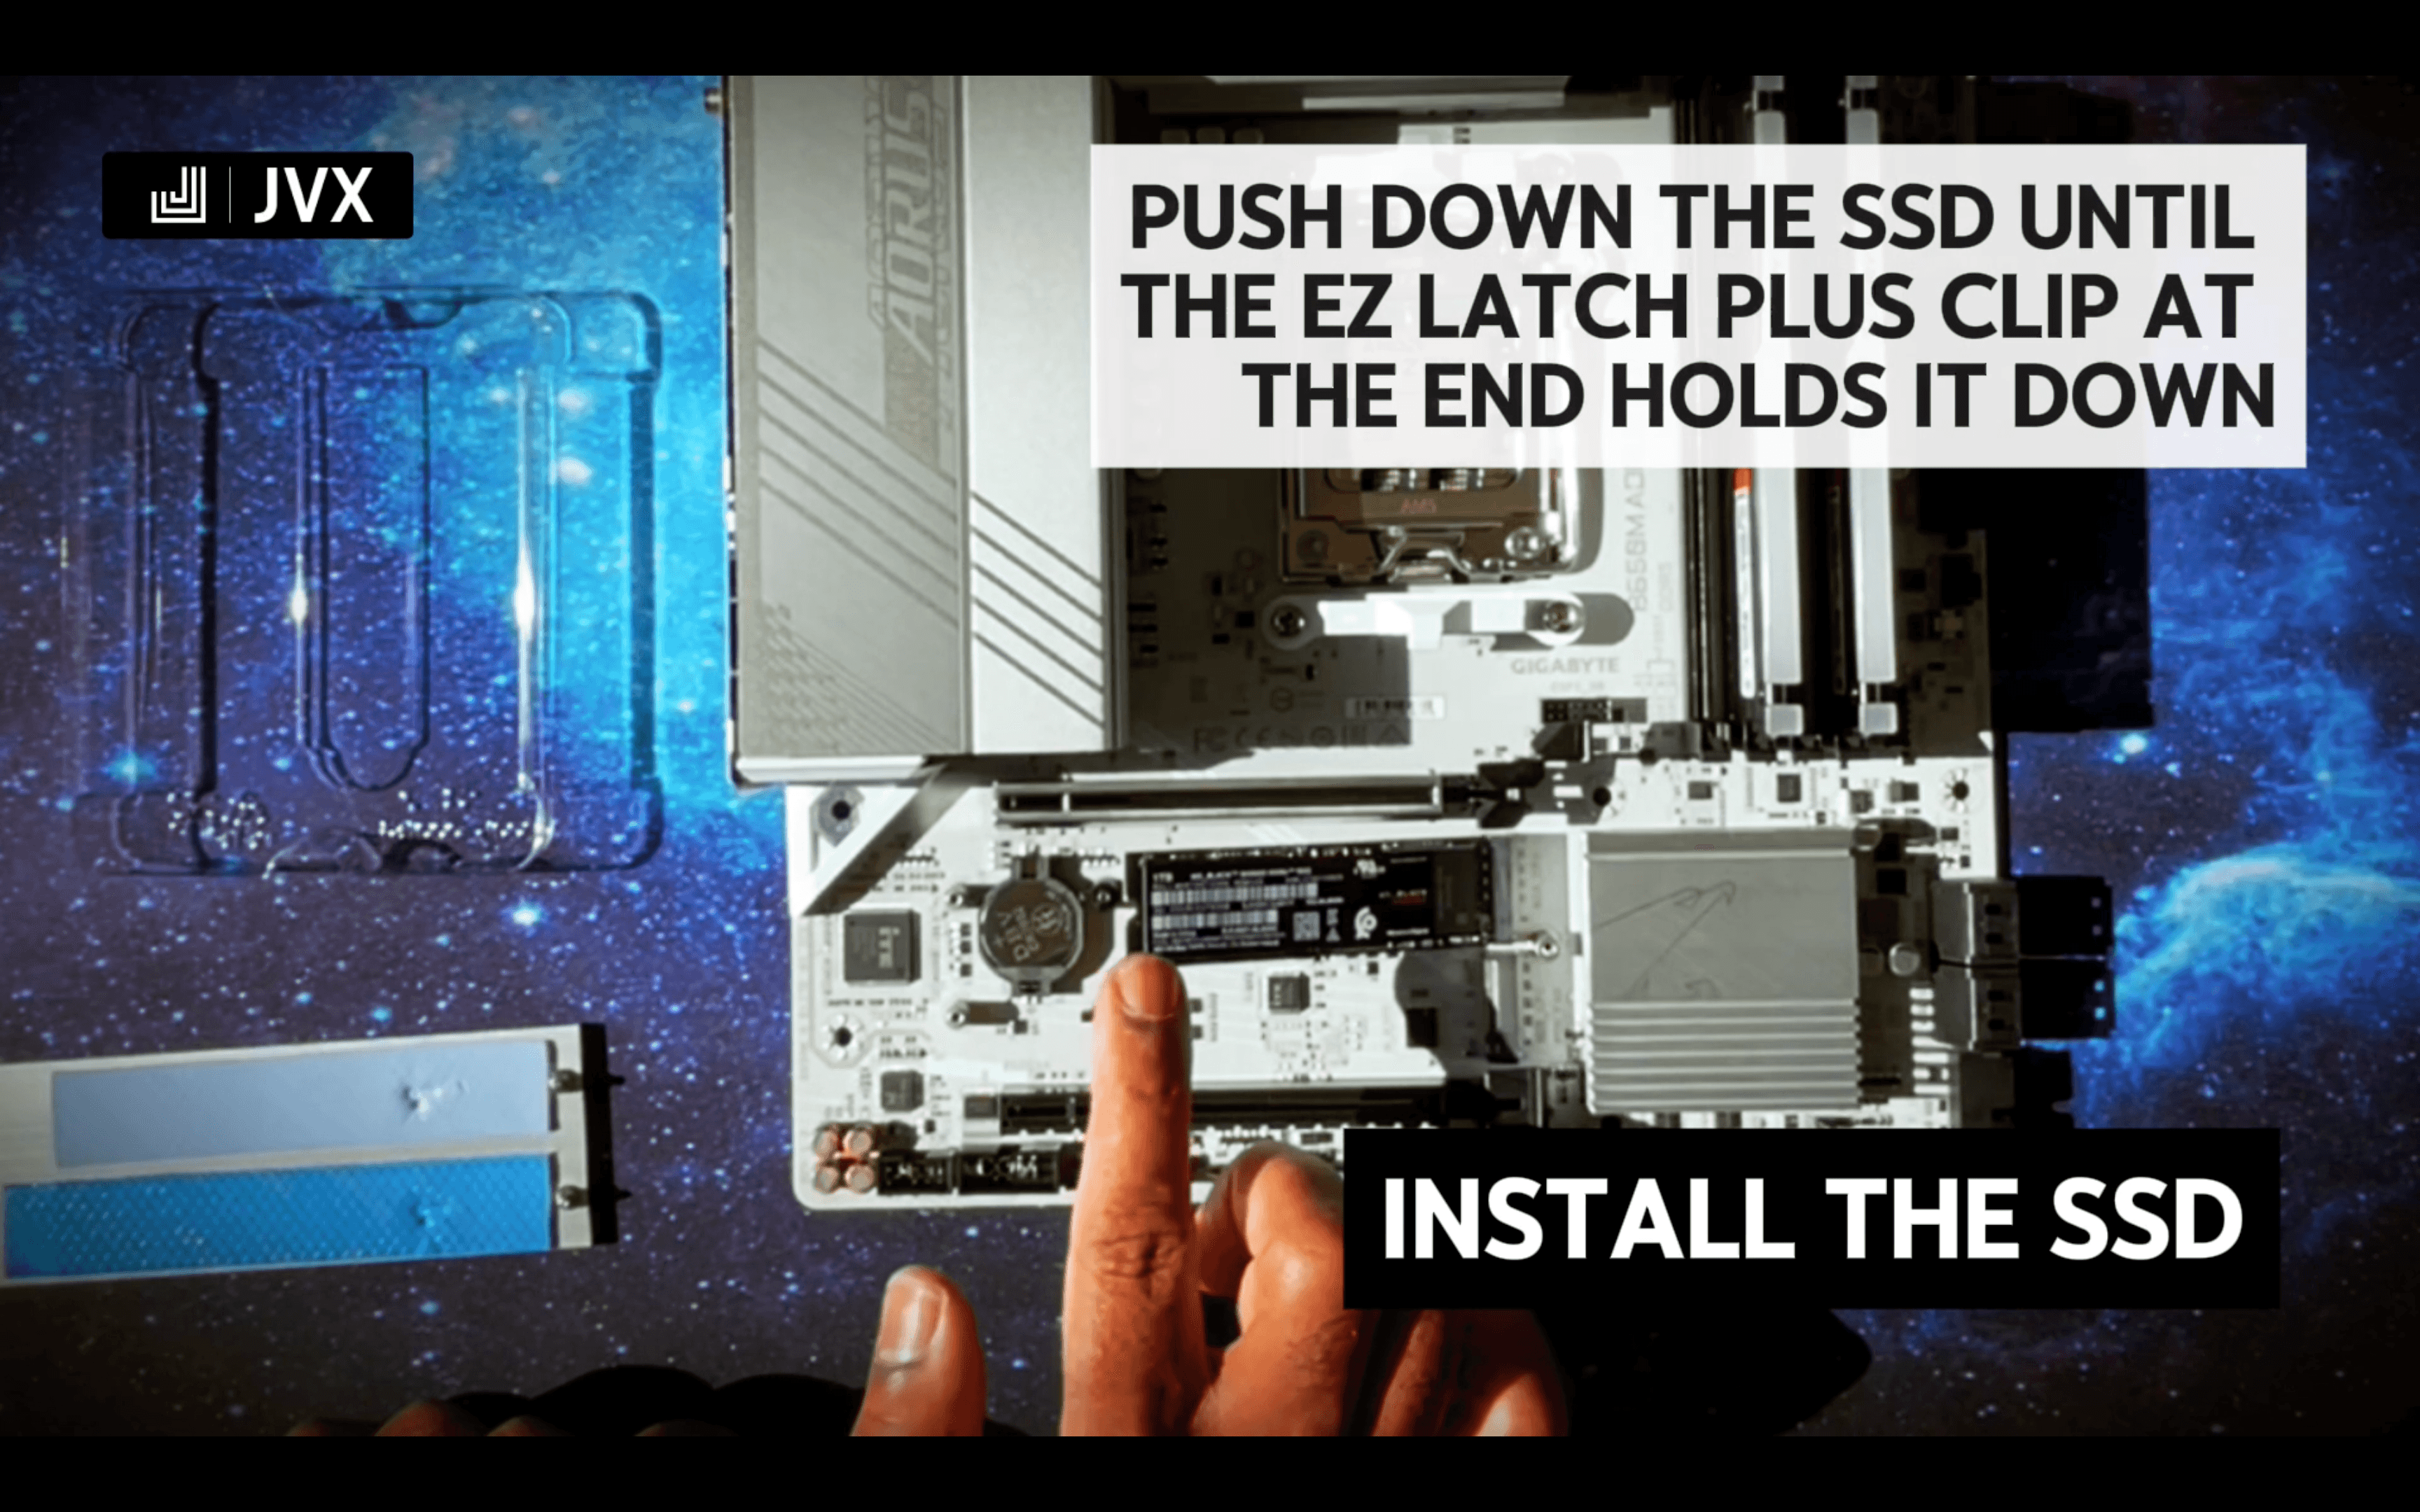
Once inserted, push the SSD down flat towards the motherboard. The EZ Latch Plus clip will automatically lock it in place, securing it without the need for a screw.
Reattach the Heatsink
Carefully position the M.2 heatsink back over the SSD, ensuring it aligns with the mounting holes. Fasten the screws securely to hold the heatsink in place.
Your M.2 SSD is now installed! 🎉 This ultra-fast storage will significantly improve boot times, game loading speeds, and overall system responsiveness.
With the CPU, RAM, and SSD installed, your motherboard is now fully prepared for the next step—mounting it inside the case! 🚀
Installing the Motherboard - 💎 Build Video
Now it's time to install the Gigabyte B650 AORUS ELITE AX ICE motherboard into the case! If you'd like a detailed visual guide, follow along with the video above.
About the Motherboard
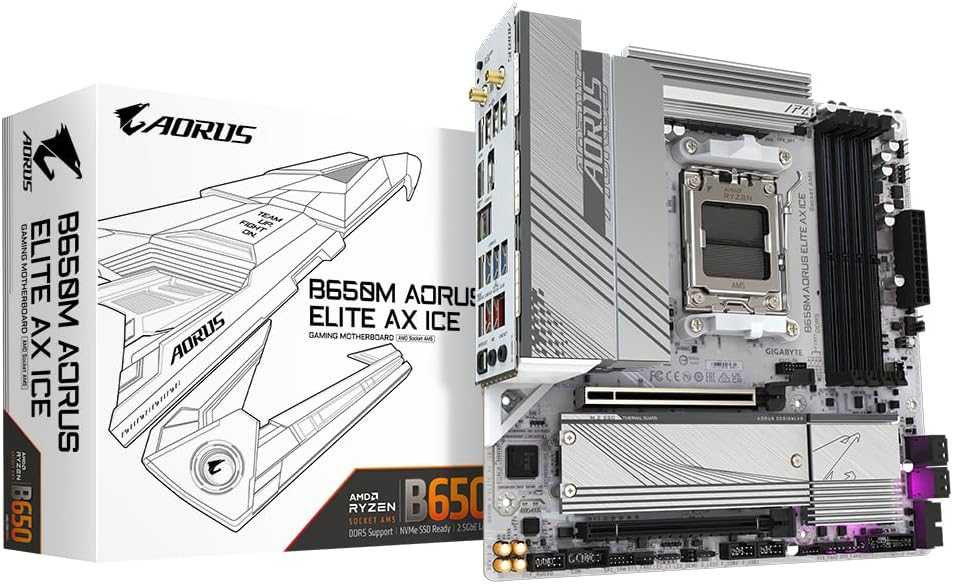
The Gigabyte B650 AORUS ELITE AX ICE is a high-performance ATX AM5 motherboard designed for AMD Ryzen 7000 series processors. It offers a fantastic mix of power, features, and aesthetics—perfect for gamers, enthusiasts, and content creators.
Key Strengths
- Premium Build & Cooling – 12+2+1 digital VRM design with robust heatsinks ensures stable power delivery and efficient cooling.
- Blazing-Fast Connectivity – Features PCIe 4.0, USB 3.2 Gen 2, and Wi-Fi 6E for ultra-fast speeds and low-latency networking.
- Future-Proof Memory Support – Optimized for DDR5 RAM, delivering better bandwidth and performance for demanding applications.
- Expandability & Storage – Multiple M.2 slots (PCIe 4.0) and SATA ports allow flexible storage options.
- Sleek ICE Aesthetic – A stunning white-themed design that looks great in modern builds.
With its top-tier performance, reliable power delivery, and stylish design, this motherboard is a fantastic choice for a fast, stable, and visually stunning PC.
Now, let’s carefully install the motherboard into the case step by step.
Prepare for the Installation
- Lay the case down on its side to make installation easier.
- Grab the standoff wrench from the accessory box from the case—we will need to adjust the motherboard standoffs to fit the ATX board.
Adjust the Case Motherboard Standoffs

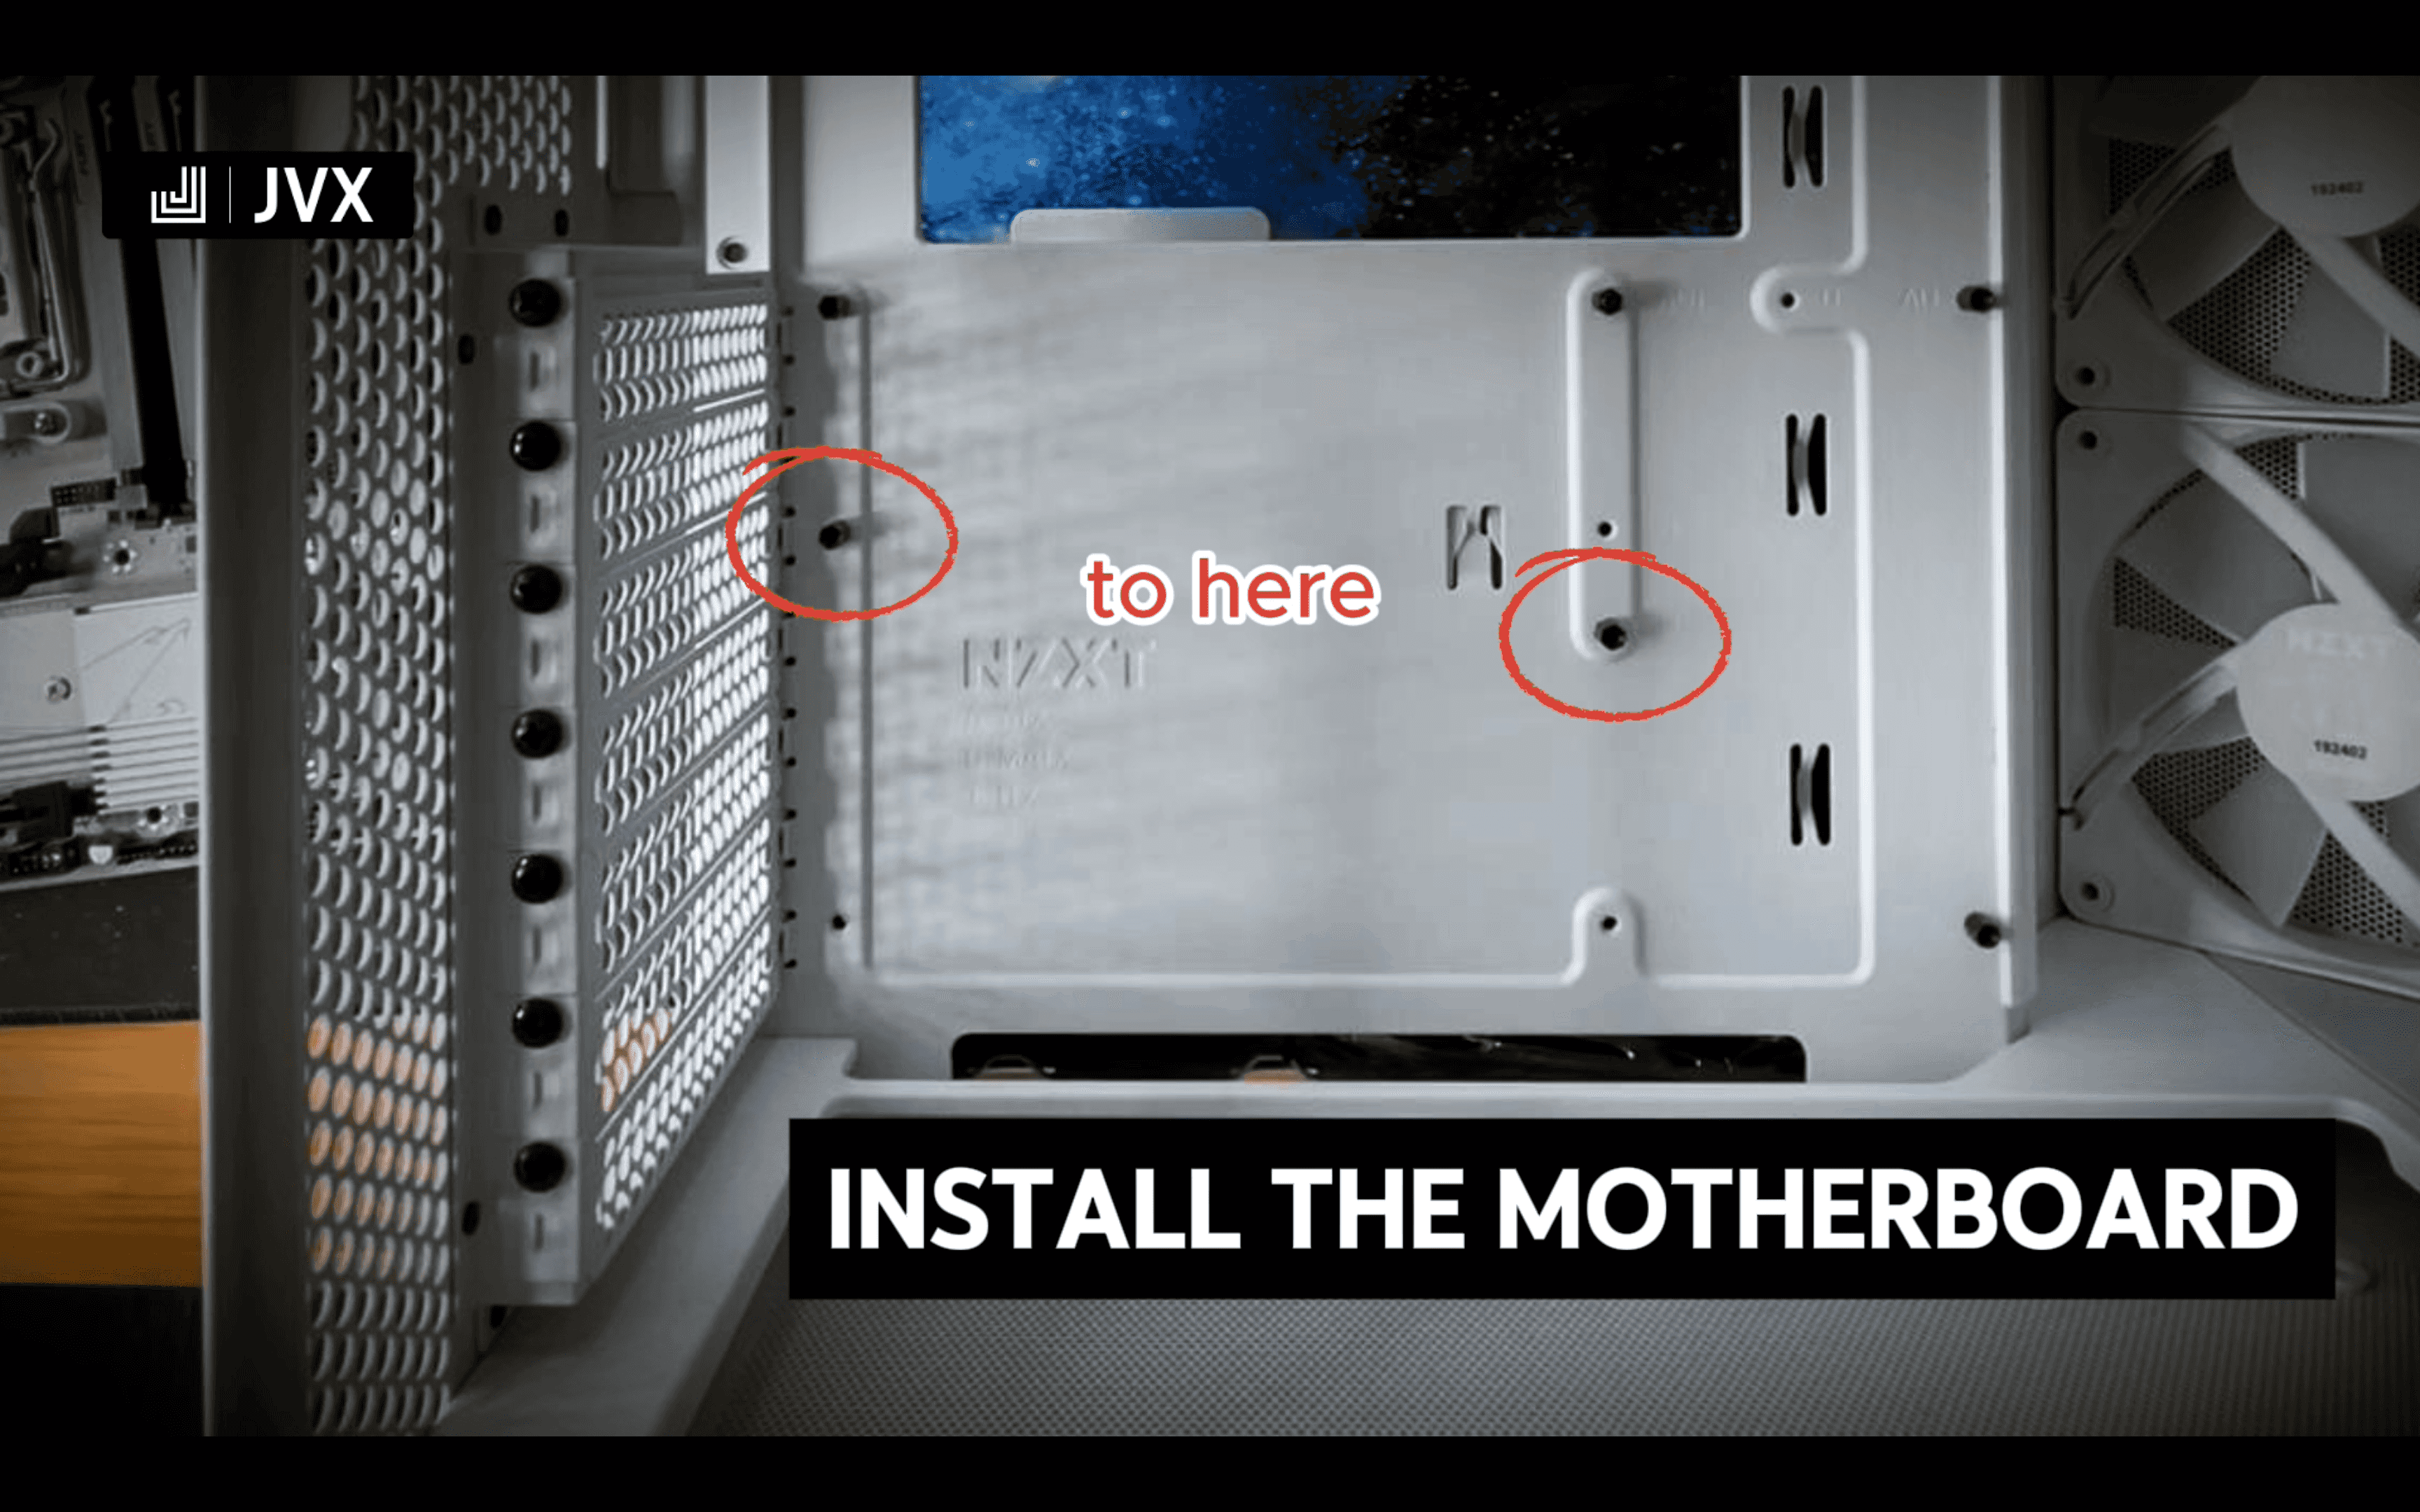
- Place the standoff wrench onto the two incorrectly positioned standoffs and loosen them.
- Hand-tighten the standoffs into the correct positions.
- Use the standoff wrench to secure them firmly.
Position the Motherboard
- Carefully place the motherboard into the case.
- The mounting holes on the motherboard should align with the standoffs.
- Make sure the I/O panel fits properly into the back of the case.
Secure the Motherboard
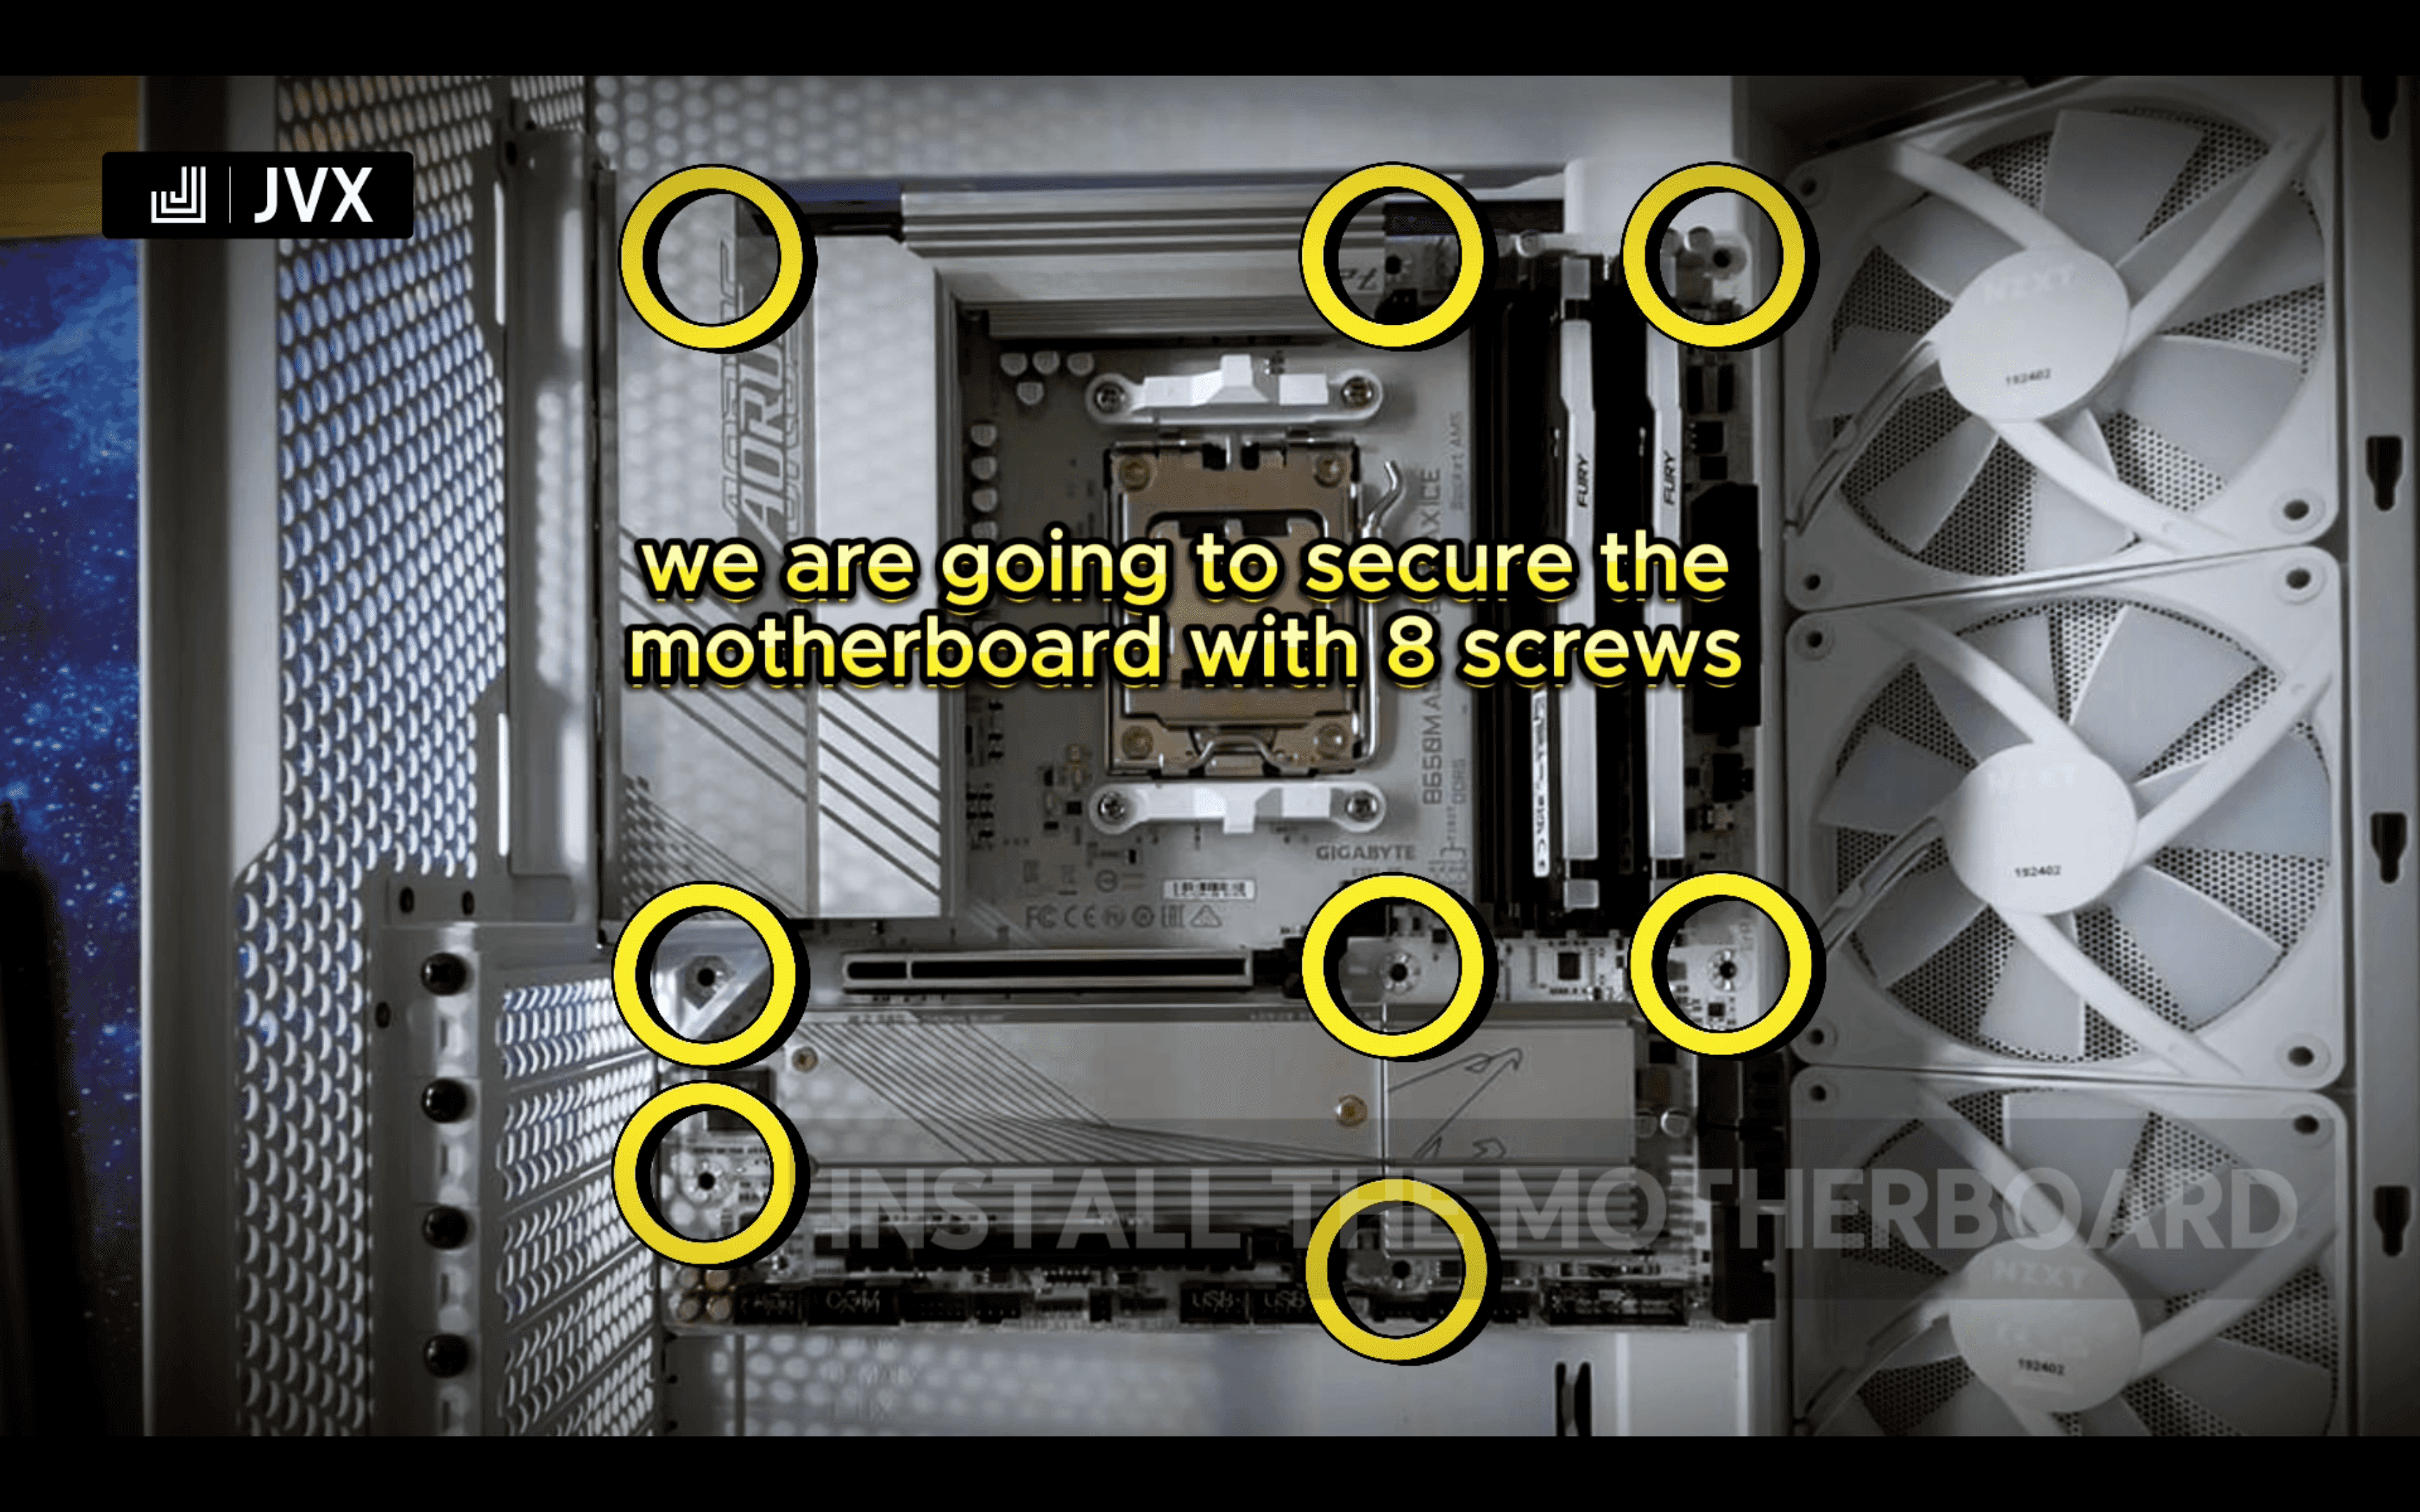
- Use the 6-32 5mm screws to fasten the motherboard.
- Carefully screw in all the screws, making sure not to overtighten.
And that's it—your motherboard is now securely installed! 🎉 Next up, we’ll start connecting components and cables.
Installing the Fans and AIO Cooler - 💎 Build Video
Cooling is a critical part of any PC build. Proper airflow ensures stable performance and longevity by keeping temperatures in check. In this section, we’ll install the NZXT F140 RGB bottom fans and the NZXT Kraken 360 RGB AIO cooler to create an efficient cooling system.
What These Components Do
- Bottom Fans (NZXT F140 RGB 89.48 CFM 140 mm Fans 2-Pack) – These high-performance fans pull cool air into the system, improving airflow and overall thermal management.
- AIO Cooler (NZXT Kraken 360 RGB 78.02 CFM Liquid CPU Cooler) – A liquid cooling system that efficiently dissipates heat from the CPU, ensuring stable temperatures even under heavy workloads. The built-in RGB lighting also adds a stylish touch to your build.
Understanding Airflow
With the NZXT H6 RGB Flow case, we are creating a positive airflow setup. This means more air is being pulled into the case than being exhausted. Here's how the airflow works:
- The three pre-installed case fans pull cool air into the case from the front.
- The two bottom-mounted NZXT F140 fans also bring in additional cool air from below.
- The three radiator fans on the NZXT Kraken 360 AIO pull warm air out of the case, acting as exhaust.
This positive pressure setup helps prevent dust buildup by pushing air out of any unsealed openings, ensuring a cleaner and more efficient cooling system.
Installing these cooling components correctly will help maintain a quiet, cool, and high-performing system. Let’s get started!
Installing the Bottom Fans
Installing the bottom fans will help improve airflow, bringing cool air into your system.
About the Fans
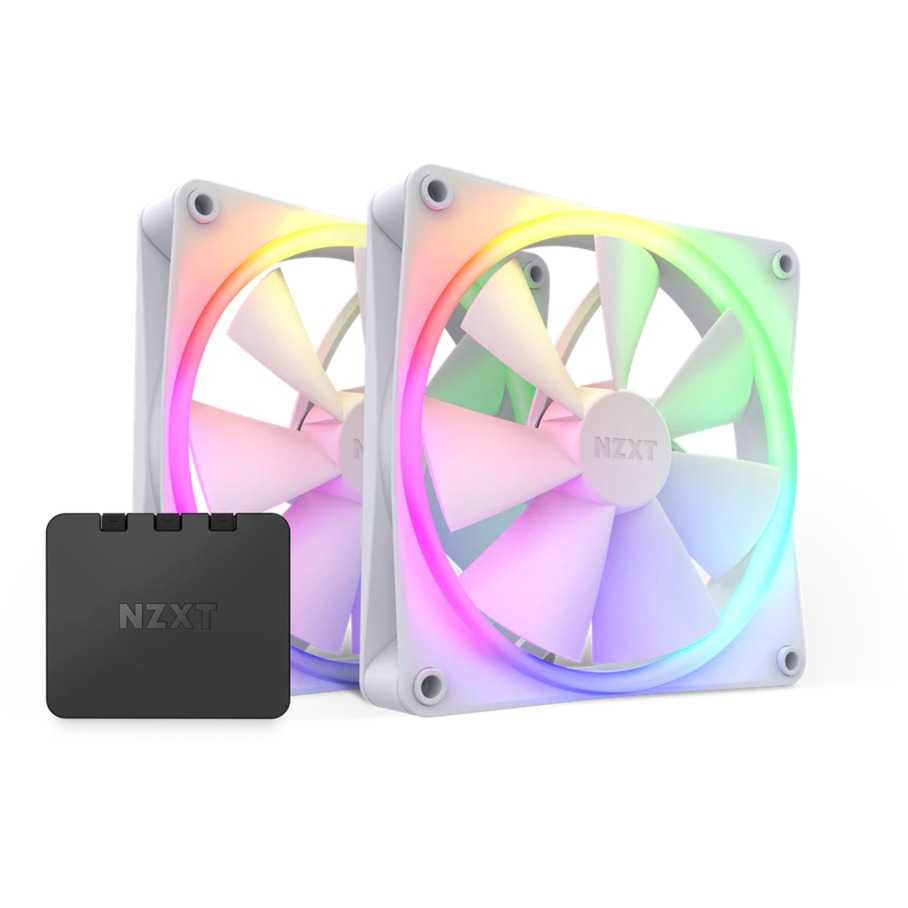
We'll be installing NZXT F140 RGB 89.48 CFM 140 mm Fans as intake fans. These high-performance fans not only boost airflow but add a touch of RGB lighting to your build.
Key Strengths
- High Airflow – Moves up to 89.48 CFM, ensuring efficient cooling.
- RGB Lighting – Customizable lighting to match your build’s aesthetics.
- Quiet Operation – Engineered for low noise, even at high speeds.
Unbox the Fans
Start by unboxing the NZXT F140 RGB 2-Pack. Inside, you'll find two 140 mm fans and an RGB controller. Set the controller aside—we'll connect it later during the wiring phase.
Prepare for Installation
We'll be securing the fans with the CB5 13.5MM screws that came with your case. These screws fit the mounting points on the bottom of the case better than the ones included with the fans.
Position the Fans
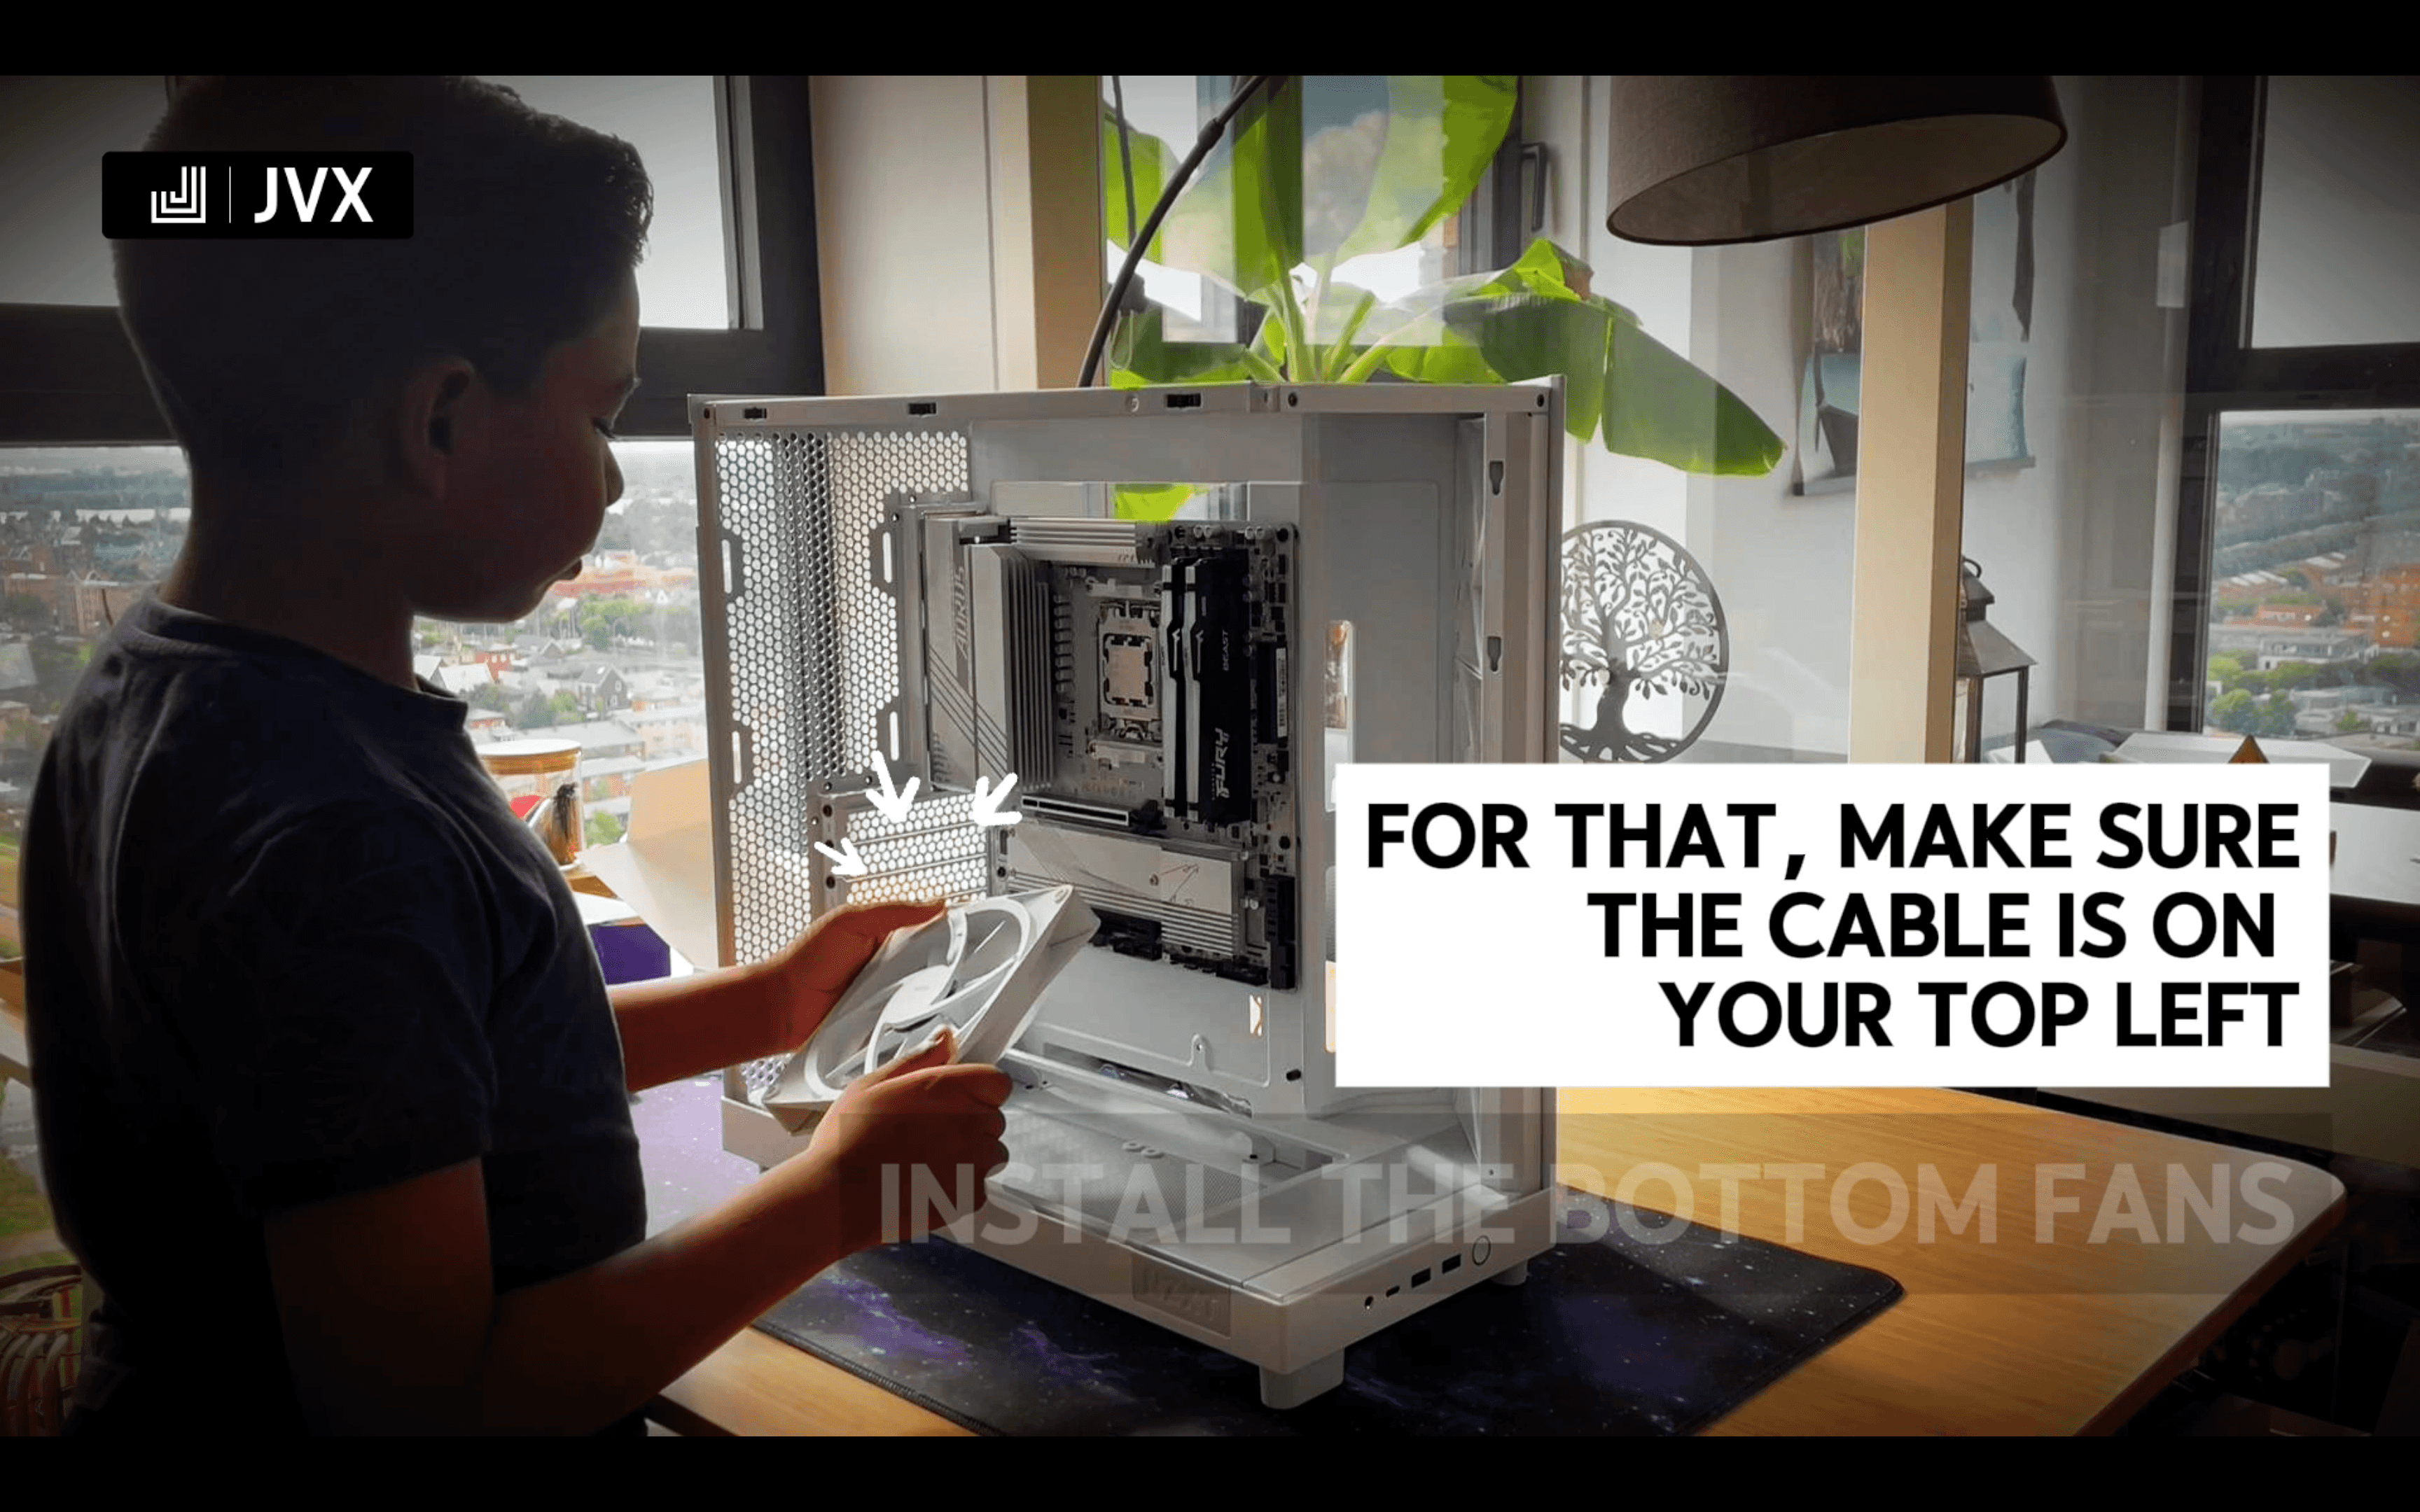
For proper airflow, we're installing the fans as intake, bringing cool air into the system.
Hold the fan so the cable is on the top left corner. The less attractive side (the side with the fan motor and frame supports) should be facing up—this ensures air is drawn into the case.
Carefully route the fan cables through the case’s cable management cutouts toward the back, keeping your build tidy.
💡 Tip: If you hold the fan correctly and give it a spin, you should feel the air flowing in the intended direction—this is a quick way to double-check airflow before securing it in place.
Secure the Fans
Lay the case on its side for easier access. Position each fan so it sits flush against the bottom fan mounts. Secure them with eight CB5 screws—four per fan—tightening them evenly to avoid overtightening.
Bottom Fans Installed!
That's it—your bottom fans are now installed! 🎉 These fans will help keep your system cool, especially during long gaming sessions.
Installing the AIO Cooler
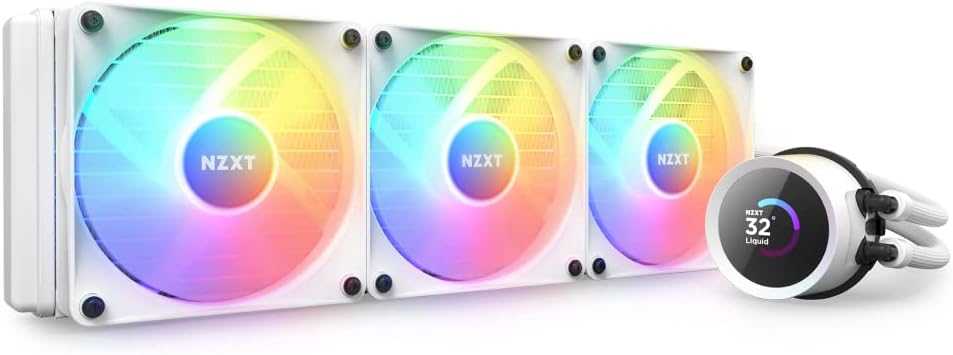
Keeping your CPU cool is crucial for maintaining performance and longevity. The NZXT Kraken 360 RGB 78.02 CFM Liquid CPU Cooler provides efficient cooling with a sleek design and vibrant RGB lighting.
About the AIO Cooler
This all-in-one (AIO) liquid cooler helps dissipate heat more effectively than air coolers, ensuring stable temperatures even under heavy loads.
Key Strengths
- High Cooling Performance – 360mm radiator provides excellent heat dissipation.
- RGB Integration – Customizable lighting for a visually stunning build.
- Quiet Operation – Optimized fan and pump design minimize noise levels.
Unbox and Prepare the AIO
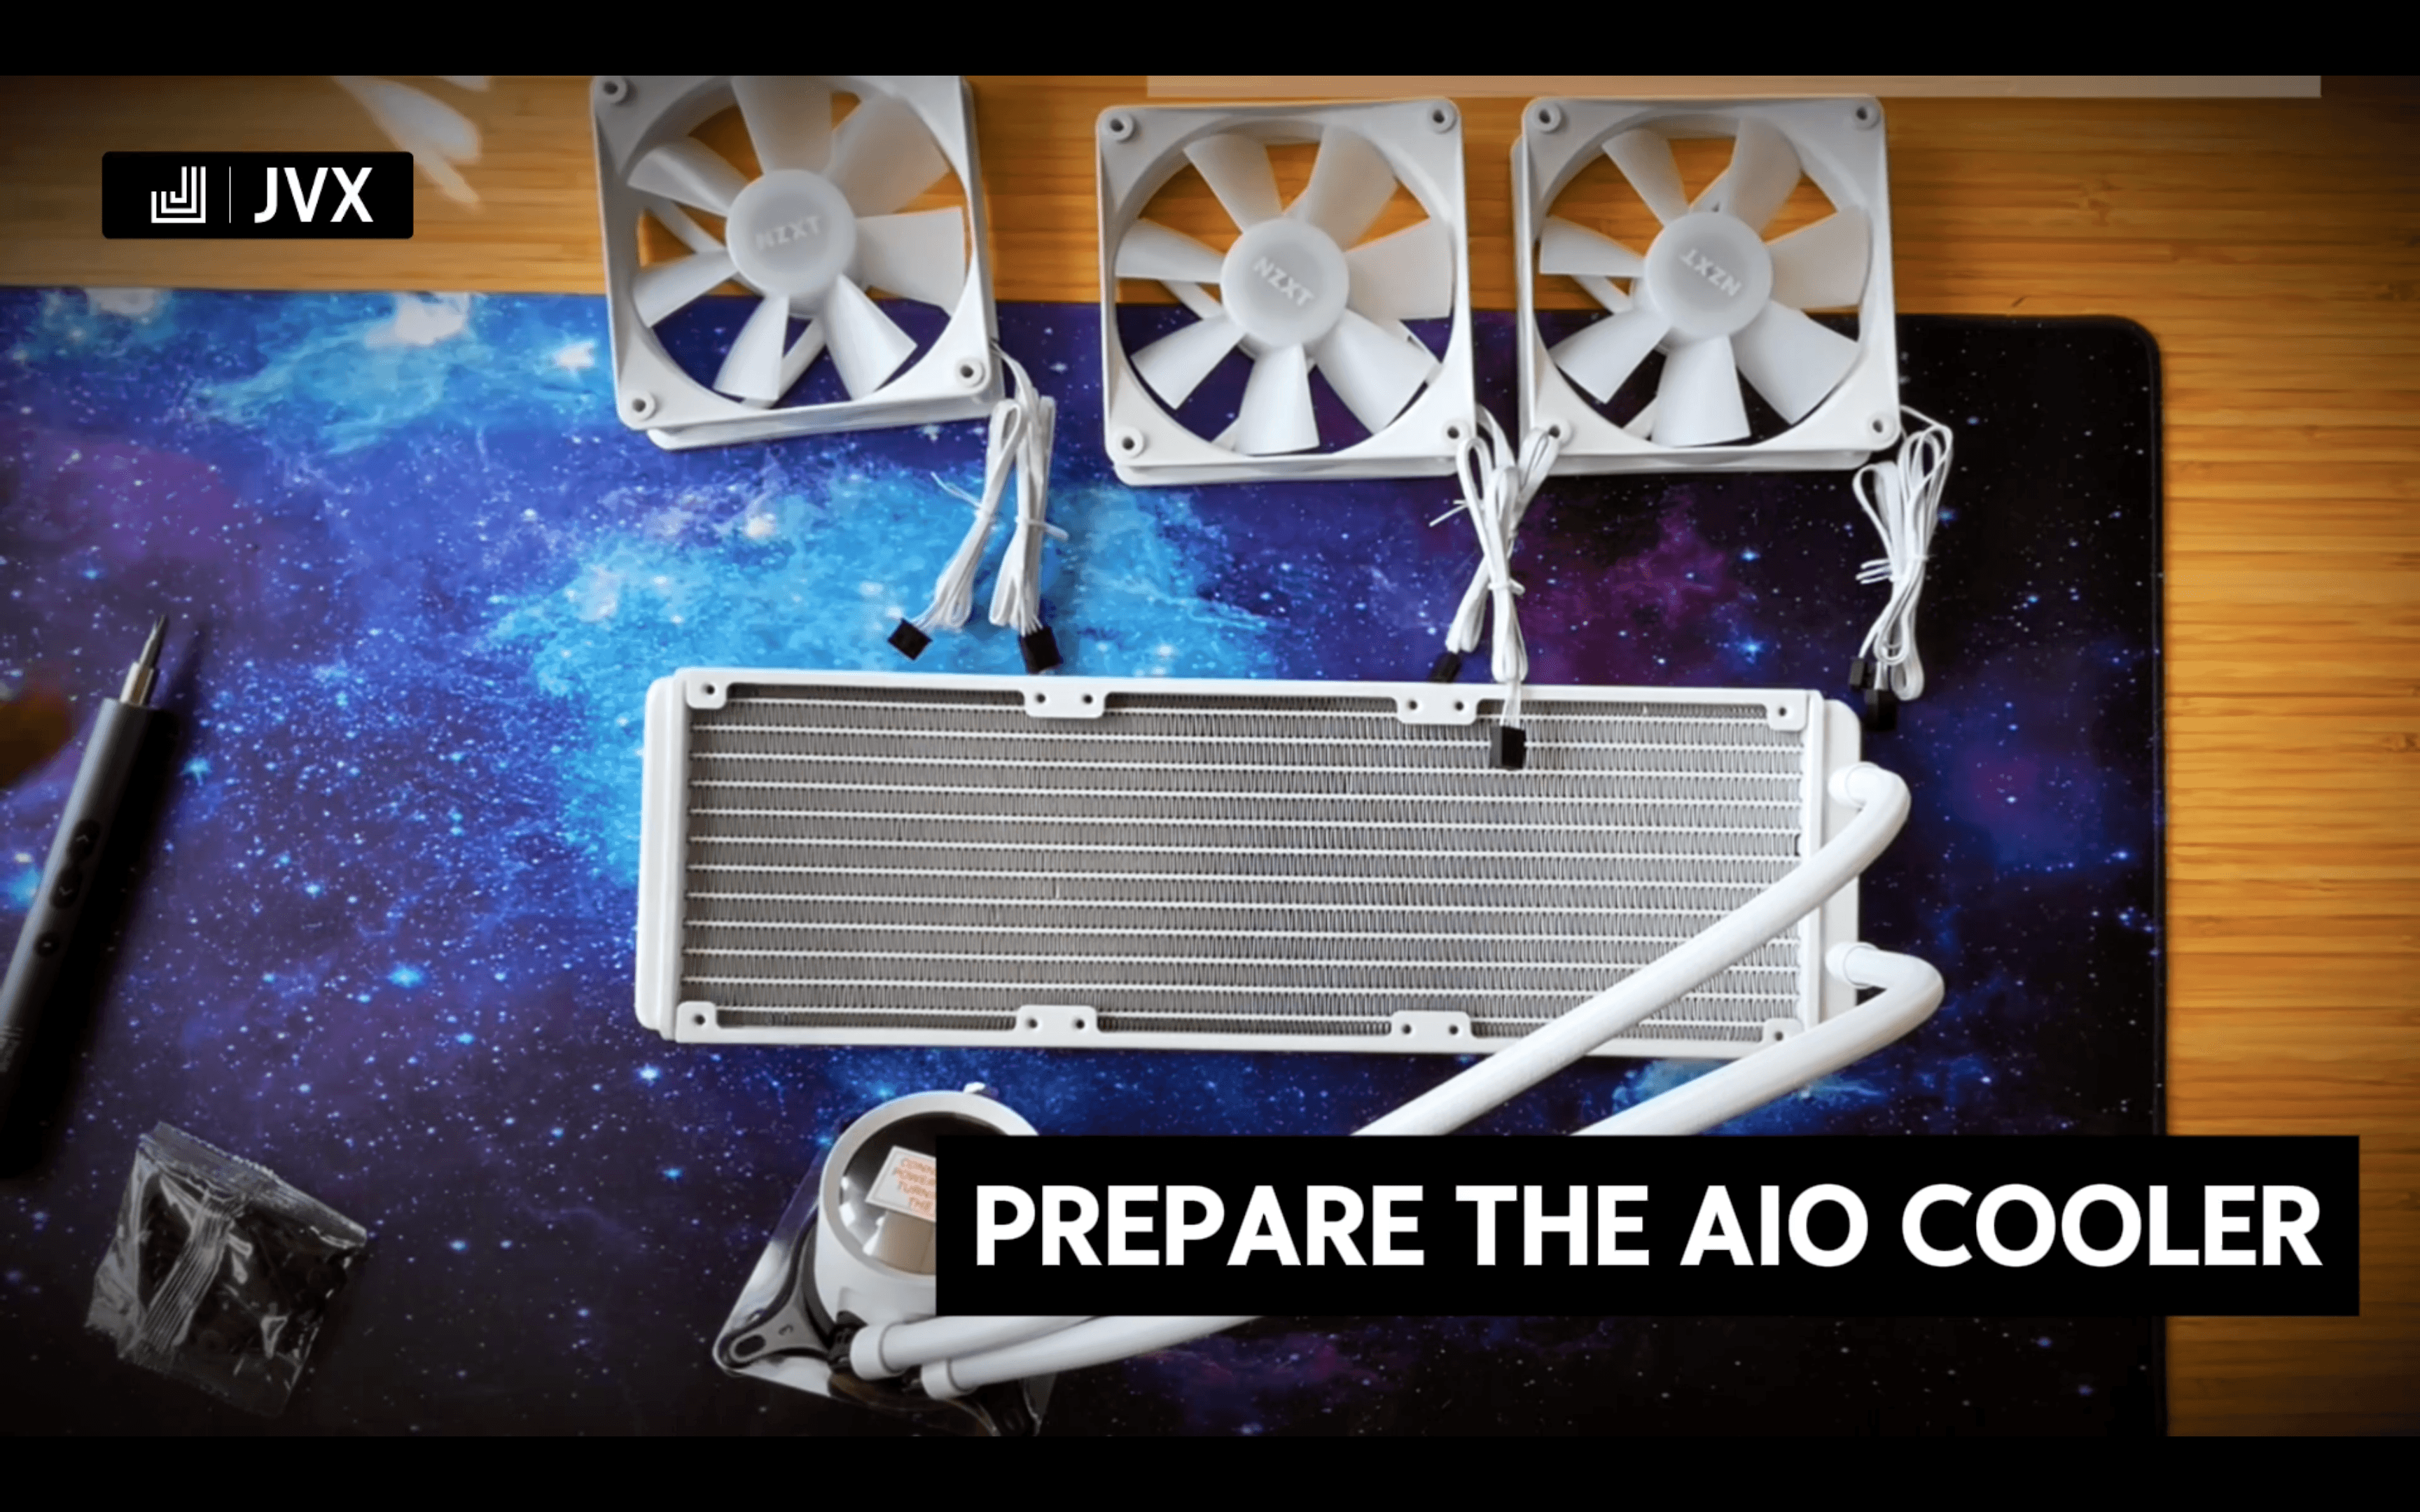
Start by unboxing the NZXT Kraken 360 RGB and laying out all components on your workspace. This will make installation easier and more organized.
We’ll be using the 30mm screws and washers included with the AIO cooler for installation.
Install the Fans
We’ll install the included fans as exhaust to remove hot air from the system.
- Position the fans on the radiator with the airflow direction facing out of the case. You should be looking at the NZXT logos for each fan.
- Secure each fan with four screws and washers.
- Double-check that the fans are firmly in place before proceeding.
Install the Radiator
- Position the radiator inside the case, ensuring the tubing is routed neatly.
- Use the 5mm case screws to secure the radiator to the case.
- Each fan should be fastened with four screws.
Mount the Pump Bracket
We’ll use the AMD sleeves to install the pump. Ensure that the “AM5” text is facing up.
- Remove the stock AMD mounting bracket by unscrewing the four screws and taking off the brackets.
- Insert the standoffs, making sure the screw faces down and the sleeve labeled “AM5” is facing up.
- Hand-tighten the four sleeves to secure them in place.
Prepare the CPU Bracket
Since we’re installing the cooler on an AMD system, we need to replace the default Intel bracket with the AMD bracket.
- Remove the plastic cover from the pump carefully, making sure not to touch the pump
- Turn the bracket counterclockwise to detach it.
- Attach the AMD bracket at the same angle and turn it clockwise to lock it in place.
Mount the Pump
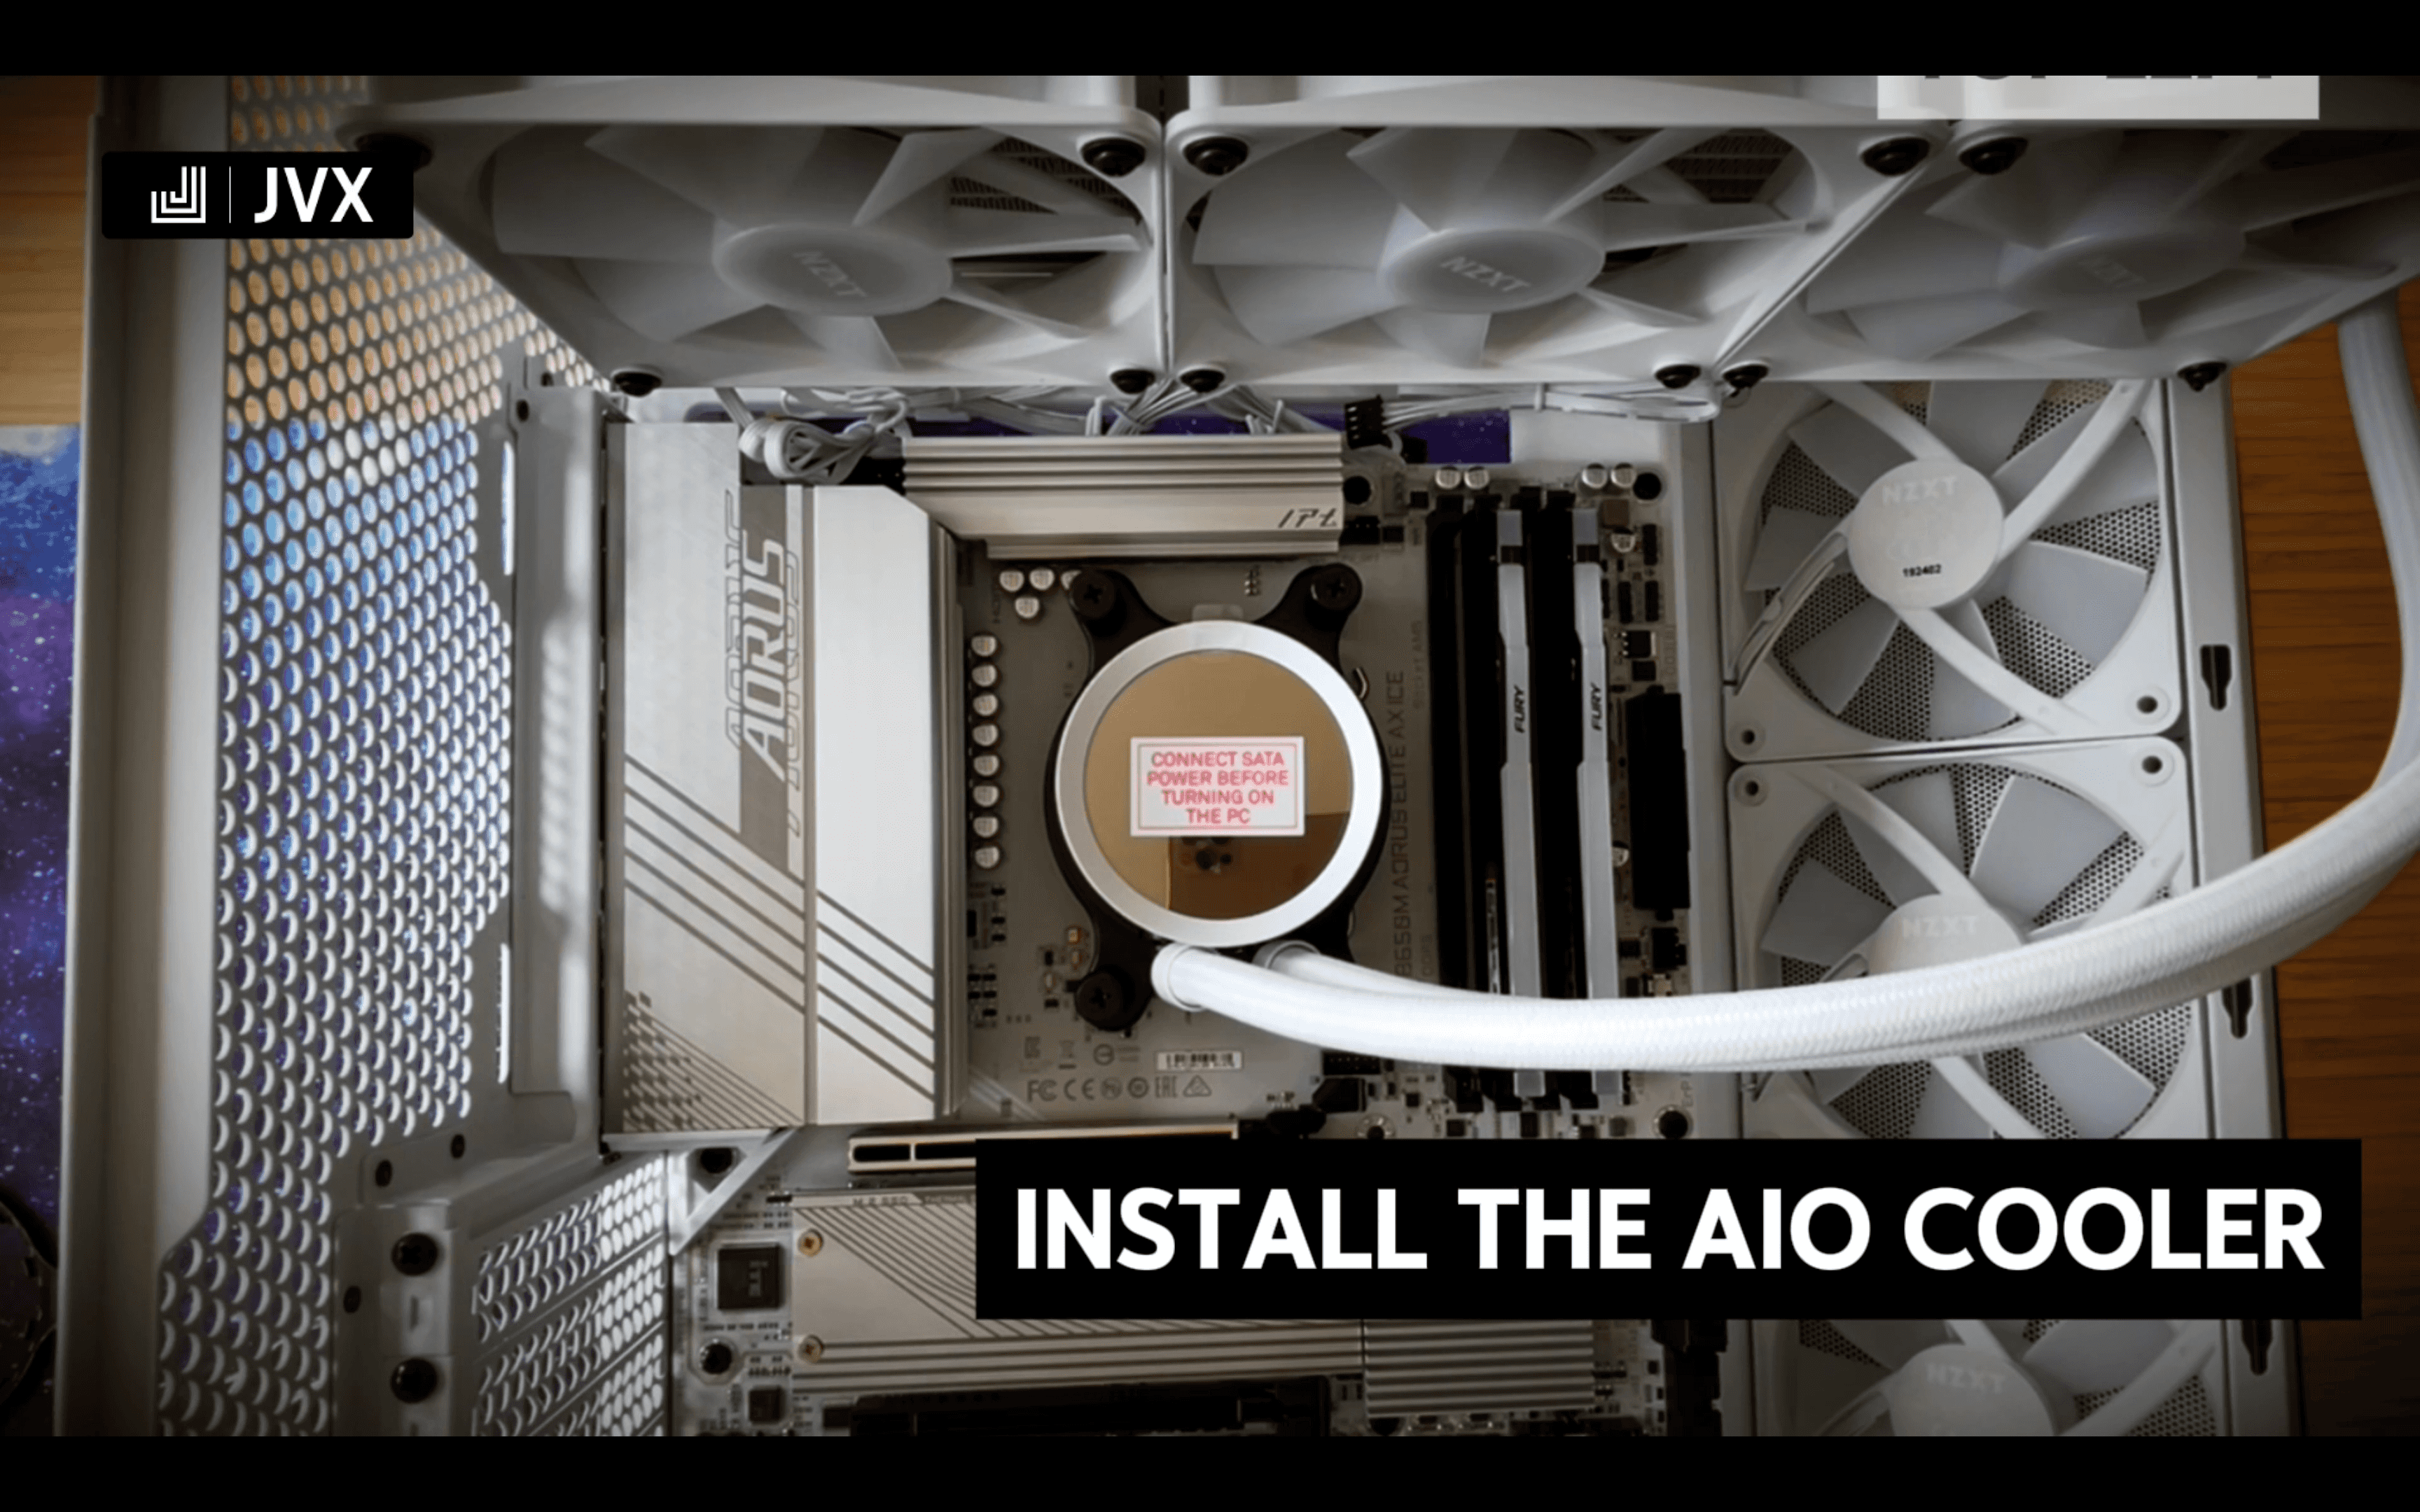
- The cooler comes with pre-applied thermal paste, so no additional application is needed.
- Place the pump onto the standoffs.
- Secure it with thumb nuts in this order: top right, bottom left, top left, bottom right.
- Use a screwdriver to fully tighten the nuts in the same order.
Final Steps
- Remove the plastic film from the pump’s screen.
- Ensure all cables are routed neatly to the back.
AIO Cooler Installed!
That’s it! Your AIO cooler is now installed 🎉. This will keep your CPU running cool and efficient, even during intense gaming sessions.
Installing the GPU - 💎 Build Video
The GPU (Graphics Processing Unit) is one of the most important components in your gaming PC. It handles graphics rendering, enabling high-quality visuals and smooth frame rates in games and creative applications. In this section, we’ll install the Gigabyte AERO OC GeForce RTX 4060 8 GB Video Card into the system.
About the GPU
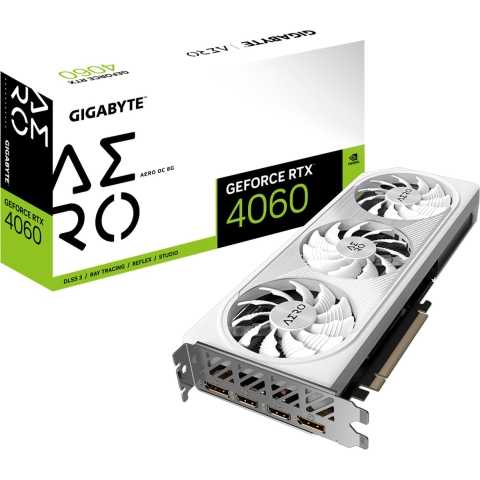
The Gigabyte AERO OC GeForce RTX 4060 is a powerful mid-range graphics card designed for high-performance gaming and content creation. It delivers excellent 1080p and 1440p gaming experiences while keeping power consumption efficient.
Key Strengths
- NVIDIA Ada Lovelace Architecture – Provides improved power efficiency, AI-driven performance boosts, and enhanced ray tracing.
- 8 GB GDDR6 VRAM – Ensures smooth gameplay and faster load times for demanding games and creative workflows.
- Windforce Cooling System – Keeps temperatures low, allowing for stable and quiet operation under load.
- DLSS 3 & Ray Tracing – Uses AI to upscale graphics and enhance lighting, making games look more realistic.
Installing the GPU
- Unbox the GPU and inspect it to ensure everything is in perfect condition.
- Remove the top two PCI chassis brackets at the back of the case to make space for the GPU.
- Set the two screws aside—we’ll use them later to secure the card.
- Remove the plastic covers from the GPU, including any protective film on the PCIe connector.
- Align the GPU with the top PCIe slot on the motherboard.
- Gently insert the GPU into the slot and press down firmly until it is fully seated. You should hear a soft click as the PCIe retention clip locks the card in place.
- Secure the GPU using the two screws set aside earlier, fastening them to the chassis.
GPU Installed!
Your GPU is now installed! 🎉 This card will deliver smooth gameplay and stunning visuals, bringing your PC build to life.
Wiring It All Up and Closing the Case - 💎 Build Video
With all the components installed, it's time to wire everything up, close the case and take your system for a test drive!
Note: For this section, it is highly recommended to follow the build video for step-by-step instructions accompanied by the correct visuals.
Connecting the Case Cables
Start from the back of the case.
Unbundle the bottom fan cables so they are accessible for later use. Now, lead the case cables to their respective positions:
- F_PANEL cable → Route through the bottom front opening.
- Blue USB 3.2 Gen 1 cable → Route through the lower side opening.
- USB 3.2 Gen 2x2 cable → Route through the upper side opening.
- HD Audio cable → Route through the bottom rear opening.
From the front of the case, connect the cables:
- HD Audio cable → Plug into the F_AUDIO header. Since one pin is missing, it can only be inserted in one orientation.
- F_PANEL cable → Connect to the left side of the F_PANEL header. The missing pin ensures correct alignment.
- Blue USB 3.2 Gen 1 cable → Connect to the F_U32 header.
- Black USB 3.2 Gen 2x2 cable → Remove the cap and connect it to the F_U320G header.
AIO Pump and Power
From the front of the case:
- Unbundle the AIO pump cables and tie them together at the top for easier handling.
- Connect the breakout cable to the pump, routing it from the back before plugging it in.
- Unbox the AsiaHorse extension cables.
- Take the 24-pin ATX AsiaHorse extension cable, insert it into the 24-pin ATX connector, and route it to the back.
About the Power Supply (PSU)
The Corsair CX550 ATX 750W is a 750W, 80 PLUS Bronze-certified power supply designed for reliability and low noise.
Key Strengths:
- 80 PLUS Bronze Efficiency – Provides up to 85% efficiency, reducing heat and power waste.
- Quiet Operation – Features a low-noise 120mm fan that adjusts speed based on load.
- Durable & Reliable – Built with sleeved cables for durability and easier cable management.
Installing the PSU
From the back of the case:
The PSU provides power to all components, so secure it properly:
- Use 6-32x6mm hexagon screws to fasten the PSU in place.
- Connect the 24-pin ATX PSU cable to the AsiaHorse extension.
Connecting the AIO Cooler
- Take the RGB controller and connect:
- The RGB cables from the three top fans.
- The controller USB cable to the USB splitter.
- Connect the three top fan power cables to the AIO breakout cable.
- Plug the AIO breakout USB cable into the same USB splitter.
- Connect the SATA power cable from the NZXT fan controller to the PSU.
- Connect the SATA power cable from the AIO breakout cable to the PSU.
Connecting the Bottom Fans
- Take the second RGB controller and connect:
- The SATA power cable to the PSU.
- The RGB cables from the two bottom fans.
Final Wiring – AIO Power
- Locate the 3-pin connector from the AIO breakout cable.
- Find the CPU_OPT connector on the motherboard.
- Plug the 3-pin cable into the right side of the 4-pin connector. The cable guides will ensure proper alignment.
Final Wiring – USB
- Locate the USB cable from the USB splitter and the USB cable from the bottom fans.
- Route them to the front and connect them to the F_USB1 and F_USB2 headers.
Final Wiring – Fan Headers
- Locate the two bottom fan power cables and the black case fan power cable.
- Route them to the front and connect them to the SYS_FAN1, SYS_FAN2, and SYS_FAN3 headers.
Final Wiring – Case Fans RGB
- Locate the case fan RGB connector.
- Route it to the front and plug it into the D_LED1 header, positioned left of the USB headers.
Final Wiring – GPU
- Locate the PCIe 6+2 connectors from the PSU.
- Connect them to the AsiaHorse 6+2 PCIe extension cable.
- Plug the extension cable into the GPU.
Final Wiring – 8-Pin Power
- Locate the 8-pin EPS12V cable from the PSU.
- Plug it into the ATX_V12 connector at the top left of the motherboard.
Time for a Test! 🎉
With all components connected, it's time to power up your system and ensure everything is working correctly.
- First, plug in the main power cable and switch on the PSU.
- Flip the PSU switch to "1" to turn on the power supply.
- Press the power button on your case. If everything is set up correctly, your build should come to life—fans will start spinning, and the RGB lighting will turn on.
Woohoo 💪🥳🎉. Time to close up the case.
In the exceptional case that the PC does not boot, you need to troubleshoot the issue. Double-check that all power cables, data cables, and other connectors are firmly and correctly connected. Go through the build videos step by step and make sure you did not miss any step. Ensure that cables are plugged into the appropriate headers and ports.Refer to this example video for further guidance on troubleshooting common boot issues.
Closing the Case
Securing the Front Panel
- Take the front panel and remove the protective plastic from both sides.
- Gently push the panel into place until it aligns properly.
- Secure it with five screws to hold it firmly in position.
Attaching the Top Panel
- Take the top panel and click it into place securely.
Installing the Side Panels
- Grab the side panel and remove the protective plastic from both sides.
- Gently push it into place and secure it using the thumb screw at the back.
- Once done, repeat the process for the back side panel to fully enclose the case.
Congratulations! Your system is now up and running! Your build is now complete and fully enclosed, ready to power up and install Windows! 🚀
Installing Windows and Configuring Your PC
Install Windows 11
With your bootable USB stick prepared, you can now proceed to install Windows 11 on your new PC. Follow these steps to complete the installation:
Steps to Install Windows 11:
-
Insert the USB Stick:
- Plug the bootable Windows 11 USB stick into a USB-A port on the back of your Gigabyte B650 AORUS ELITE AX ICE motherboard.
-
Enter BIOS/UEFI Settings:
- Power on your PC and immediately press the
Deletekey repeatedly to enter the BIOS.
- Power on your PC and immediately press the
-
Set USB as Boot Device:
- In the BIOS, go to Settings > Boot > Boot Option Priorities.
- Set your USB drive as the primary boot device.
- Press
F10to save changes and exit.
-
Boot from USB:
- Restart your PC, and it should now boot from the USB stick.
- Follow the on-screen instructions to start the Windows 11 installation.
-
Follow Installation Prompts:
- Select your preferred language, time, and keyboard settings.
- Click Install Now and follow the prompts.
- When asked for a product key, enter your pre-purchased product key and click Next to continue.
- Choose Custom Installation and select your WD_Black SN850X 1TB NVMe SSD as the install drive.
- Let Windows complete the installation and restart your PC when prompted.
-
Complete Setup:
- Follow the Windows 11 setup guide, create your user account, and configure settings as needed.
Your Windows 11 installation is now complete. Next, we’ll install the necessary drivers.
Install Drivers
To ensure your new PC runs smoothly, install the latest drivers for your motherboard, GPU, and other components.
1. Install Motherboard Drivers
- Visit the Gigabyte Download Page:
- Go to the Gigabyte B650 AORUS ELITE AX ICE support page.
- Download and install the following drivers:
- Chipset Driver – Optimizes motherboard performance.
- WiFi & Bluetooth Driver – Enables wireless connectivity.
- LAN Driver – Ensures a stable Ethernet connection.
- Realtek HD Audio Driver – Improves sound quality.
- RGB Fusion Software – Controls the RGB lighting on your motherboard.
2. Install AMD Drivers
- Download AMD Auto-Detect Software:
- Visit the AMD Drivers & Support page.
- Run the Auto-Detect Tool to install the latest drivers for your Ryzen 5 7600X processor.
3. Install NVIDIA GPU Drivers
- Download the NVIDIA App:
- Go to the NVIDIA App page.
- Install the software and update your Gigabyte AERO OC GeForce RTX 4060 drivers.
Enable XMP (EXPO)
To ensure your Kingston FURY Beast RGB 16GB DDR5-6000 RAM runs at full speed, enable EXPO in the BIOS.
Steps to Enable EXPO:
-
Enter BIOS:
- Restart your PC and press
Deleteto enter the BIOS.
- Restart your PC and press
-
Enable EXPO:
- Navigate to Tweaker > Extreme Memory Profile (EXPO).
- Select EXPO Profile 1.
-
Save and Exit:
- Press
F10, confirm changes, and exit.
- Press
-
Verify Settings:
- Boot into Windows and check RAM speed using Task Manager (Ctrl + Shift + Esc) > Performance > Memory.
Adjust Display Settings
To take full advantage of your high-refresh-rate monitor, adjust the refresh rate in Windows settings.
Steps to Adjust Refresh Rate:
-
Open Display Settings:
- Right-click the desktop > Display settings.
- Scroll down and click Advanced display settings.
-
Set Refresh Rate:
- Under Refresh rate, select the highest available setting (e.g., 144Hz or 165Hz).
- Click Apply and confirm changes.
Your PC is now fully configured for peak performance. Enjoy your new build!
Final Steps and Congratulations! 🎉
Congratulations! You’ve successfully built your gaming PC from scratch, installed Windows 11, updated your drivers, and optimized your settings. That’s a huge accomplishment—well done! Your PC is now ready to deliver an amazing gaming and computing experience.
What’s Next?
Now that your system is up and running, here are a few final tips to help you get started:
1. Install Your Favorite Browser
The default Microsoft Edge browser is fine, but you might prefer alternatives like:
- Google Chrome – Download here
- Mozilla Firefox – Download here
- Opera GX – A gamer-focused browser with performance optimization – Download here
2. Install the YouTube App
If you watch a lot of gaming content or tutorials, you can install the YouTube app for a more streamlined experience.
- Open the Microsoft Store and search for YouTube
- Click Install and launch it from your Start menu
3. Install Popular Gaming Platforms
Your new system is built for gaming, so let’s get your favorite games installed. Here’s where you can find them:
- Steam – Download here for thousands of PC games
- Epic Games Store – Download here for exclusives like Fortnite and GTA V
- Battle.net – Download here for Call of Duty, Diablo, and World of Warcraft
- Xbox App (Game Pass) – Get access to hundreds of games with Xbox Game Pass for PC – Download here
4. Customize Your Experience
Now that everything is set up, it’s time to personalize your system!
- Set Your Desktop Background – Right-click your desktop → Personalize → Choose a wallpaper
- Adjust RGB Lighting – Use NZXT CAM and Gigabyte Control Center to fine-tune your PC’s aesthetics
Enjoy Your New Gaming PC! 🚀
You’ve put in the effort, and now it’s time to enjoy the rewards. Whether you’re diving into your favorite games, streaming, or creating content, your PC is ready for whatever you throw at it.
Happy gaming! 🎮🔥